
Thursday, December 23, 2010

Beans... Why buy dry?


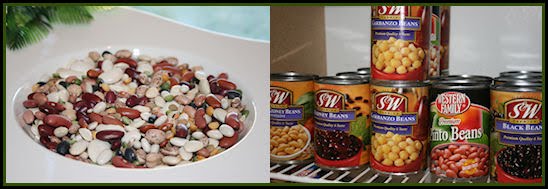
I'll admit, I'm not a very savvy shopper. My sister is relentless about wanting me to use coupons and other discounts or purchasing based on price point. But the truth is, if it tastes good or is required for a recipe, I buy it. However, these days it's almost a necessity to be a little more frugal. One thing I have been paying closer attention to is how much cheaper dried beans are from canned ones. Sure, I still keep the canned beans on hand, but they're not my first choice anymore.

Since my dollar-to-dollar sense is not my strong suit, I won't go into the actual price comparison. What makes sense to me is that it takes three 15.5 ounce cans to equal one bag of dried beans. The canned beans have already been soaked and cooked, which means they've swelled two to three sizes bigger than their dry counterpart. Add in the water and other liquids needed to preserve the beans and there are going to be even less beans filling up the can.

The even bigger bonus for me, is that I don't always want to use the entire can of beans when I'm cooking for just me and my preschooler. DH works nights & DS is often out with friends or away for entire weekends, so when reducing recipes, I can easily stretch one bag of beans out to equal about 6 cans.

The other confession I have to make, is that I'm lazy. I love to plan ahead and I don't mind prepping the day before, but there are busy days when I'll get home and need something quick. Not something that has to soak overnight.

No worries! Dried beans can be soaked at your convenience, cooked and then cooled to room temperature. Then refrigerate the beans for up to four days in a covered container. Use the amount you need in any recipe, just as you would canned beans!

Soaking dried beans for six to eight hours will allow some of the gas-producing carbohydrates to be released, which is best for all, but if you find you don't have that much time, you can still use dried beans by doing a one hour soak. To prepare beans by this method, use a medium saucepan and enough water to cover the beans. Bring to a boil and boil for one minute. Turn off the heat and allow the beans to soak for one hour. Drain and use as desired.

Now, what would a real food comparison be without looking at the nutritional differences?


Regardless of their store-bought form, all beans are rich in soluble fiber, which lowers the level of LDL cholesterol in the blood. Soluble fiber also slows down the absorption of carbohydrates, which decreases the spike in blood glucose levels. Beans are packed with protein, B vitamins and iron and are considered part of the Meat and Beans group, as well as part of the Vegetable group on the Food Pyramid. Vegetarians can fulfill their daily allowance by substituting the beans for meat, while meat-eaters can fulfill their daily allowance of vegetables by substituting beans.

Since canned or dried beans inherently contain the same good stuff, the only real difference is what's added to the canned beans.


The numbers aren't real dramatic, until you get down to the amount of sodium. From zero to 1174 mg of sodium!? Ouch. We all know salt tastes good, but unfortunately, it's not good for us. Salt is already in nearly every processed food we eat and we may not be able to avoid it completely, but we can choose to decrease the amount we take in. To reduce the amount of salt when using canned beans, instead of just draining, rinse them as well.

I don't think there will ever be a time when I don't have canned beans on hand, but just the same, there will never again be a time when I don't have dried beans either. I hope you give dried a chance, if not for the cost savings, or the satisfaction of making a whole recipe from scratch, then do it for your health.

My favorite Bean soup is my 13 Bean Crock Pot Soup posted on Food.com.

Saturday, December 11, 2010

Brining a Turkey


Photo courtesy of Feldstein Photography


Brine is essentially a salt water bath for meat. Turkey is the most common, but you can brine chicken, fresh ham or even shrimp. Brining makes changes in the cellular structure of the meat through the process of osmosis.
Osmosis, by definition is the act of a liquid, usually water that passes through a thin, semi-permeable membrane to equalize the solvent concentration on both sides of the membrane.

Meat contains a lot of water, but only a small amount of salt, so when the meat is submerged in salt water, the solvent concentration is out of balance. To balance it again, the water from the meat moves through the skin and out of the bird, while the salt and any flavors in the brine, will be pulled into the meat.
At first it seems as if we're going in the wrong direction, as we would have salty, dry meat, if cooked right now.
But, we'll give it some time and let the salt do its duty.

The salt, now in the meat, will begin to attach itself to the muscle proteins. The fibers begin to weaken, swell and separate enough to allow more water to be stored in them. So, osmosis happens again to balance out the new concentration and the water in the brine begins to refill the fibers.

When these chemical changes have been made, the meat will have absorbed approximately 10% more water and salt from its original weight.

The changes aren't instant; however, so brining must be done in advance of when you want to roast the meat.
I like to do the brine the day before and refrigerate the meat overnight.

Brined meat will cook faster than if it had been roasted without the brine. Make sure to use a meat thermometer and check the temperature at the earliest recommended cook time. But even if your bird does cook longer than needed, it will still taste moist and tender because of the broken down muscle fibers and the additional water they're holding onto. ;)

Coarse kosher salt is the preferred salt for brining, but table salt (iodine-free) or sea salt can be used. Or, try a combination of flavored sea salt and kosher salt!
Generally, 1 cup of kosher salt for every gallon (four quarts) of water is recommended. Apple or orange juice and flavored vinegars, such as apple cider vinegar or pineapple vinegar can be substituted for a portion of the water.

To balance the salty water, a sweetener should be a part of the brine. Use sugar, brown sugar, molasses, honey or even agave nectar.


Seasonings, or aromatics, are used both in the brine and roasted inside the cavity of the bird. Since only the essence of the seasonings is small enough to pass through the skin and into the meat, your options are wide open. Whole spices and fresh herbs are excellent for brining. No additional salt is needed, but try things like fresh peppercorns, allspice berries, cloves, rosemary, sage, thyme, garlic or ginger. Apples and citrus fruits make great additions to the brine.

Because you'll be marinating a whole bird, you'll need something big enough to hold it. I've used a brining bag and a (very) clean cooler in the past, but it was really only a small investment, about $8, to purchase a 5 gallon bucket with a lid.

The process is pretty simple and I like the fact that it's done the day before. It takes a bit of stress off on the day of the holiday, when so many other things have to be prepped.

I like to buy a fresh, organic turkey, so I don't have to worry about thawing first, but frozen works just as well.
Prepare the brine and then chill it before adding to the bird. Clean out the bird, rinse well and then submerge in the brine with additional cold water. Refrigerating the whole mess can be tricky though. You want to keep the brining bird chilled at 40° F and finding room in the refrigerator for a 5 gallon bucket is no easy task. We have a fridge in the garage and we can take out the bottom shelf to make the bucket fit. But luckily for us, the weather around the holiday season is usually 30° or less, so we've also just put the bucket in the garage overnight.

When it's time to roast the bird, remove from the brine (discard brine) and rinse it really well, inside and out. Pat dry and place in roasting pan.

Now is the time to add the aromatics. The apples, citrus fruits and fresh herbs can be added to the cavity of the bird, then roast immediately. :)

My favorite method of roasting is the high-heat sear at 500° F in the beginning, to create a nice crust over the bird that will lock in the moisture. Then reduce the heat to 350° and continue roasting until the thermometer reaches 160°. Tent the bird with foil and allow it to rest for 15 minutes before carving.


Photo courtesy of Feldstein Photography


Then get ready to enjoy the tastiest, juiciest turkey ever!
My favorite brining recipe, so far... is from Alton Brown's Good Eats show.

Alton Brown's Brined Turkey

1 (14-16 lb) whole turkey, frozen
For the Brine:
1 cup kosher salt
1/2 cup light brown sugar
1 gallon vegetable stock
1 tablespoon black peppercorns
1 1/2 teaspoons allspice berries
1 1/2 teaspoons chopped candied ginger
1 gallon water, heavily iced
For the Aromatics:
1 red apple, sliced
1/2 onions, sliced
1 cinnamon stick
1 cup water
4 sprigs rosemary
6 leaves sage
canola oil

2 to 3 days before roasting: Begin thawing the turkey in the refrigerator or in a cooler kept at 38 degrees F.
Combine the vegetable stock, salt, brown sugar, peppercorns, allspice berries, and candied ginger in a large stockpot over medium-high heat. Stir occasionally to dissolve solids and bring to a boil. Then remove the brine from the heat, cool to room temperature, and refrigerate. The night before you'd like to eat: Combine the brine, water and ice in the 5-gallon bucket. Place the thawed turkey (with innards removed) breast side down in brine. If necessary, weigh down the bird to ensure it is fully immersed, cover, and refrigerate or set in cool area for 8 to 16 hours, turning the bird once half way through brining. Preheat the oven to 500 degrees F. Remove the bird from brine and rinse inside and out with cold water. Discard the brine. Place the bird on rack of roasting pan and pat dry with paper towels. Combine the apple, onion, cinnamon stick, and 1 cup of water in a microwave safe dish and microwave on high for 5 minutes. Add steeped aromatics to the turkey's cavity along with the rosemary and sage. Tuck the wings underneath the bird and coat the skin liberally with canola oil. Roast the turkey on lowest level of the oven at 500 degrees F for 30 minutes. Insert a probe thermometer into thickest part of the breast and reduce the oven temperature to 350 degrees F. Set the thermometer alarm (if available) to 161 degrees F. A 14 to 16 pound bird should require a total of 2 to 2 1/2 hours of roasting. Let the turkey rest, loosely covered with foil or a large mixing bowl for 15 minutes before carving.

Wednesday, December 1, 2010

Good Gravy!


Making good gravy is a bit of a science experiment; although not a difficult one. But if there's a possibility of a shortcut to making something homemade, I'll try it! Some ideas turn out to be great and some turn out to be disasters. Even so, I say, "Take a risk!" But let me just save you the trouble of testing my gravy shortcut theory.
In my early cooking days, I always made gravy one way; by combining the flour and cold water in a lidded plastic container, used for shaking and pouring liquids. I deduced that if the water and flour mixture were to be hot before stirring into the pot, then the gravy would be on the table a whole lot quicker. Oh... how wrong I was!

I added the flour and water to my shaker container, and then put it in the microwave for about 30 seconds. I was very pleased with how nicely warmed the water was and what a genius idea this was going to turn out to be; and also wondering why no one had ever thought of it before? I popped the lid on the container and began to shake vigorously. That's when the lid exploded off like a rocket, rebounded off the ceiling and sprayed every corner of the kitchen and dining room area with white paste. We had popcorn ceilings in that old house, but after the gravy incident I started calling them papier mache ceilings.

I learned two important lessons that day. First, that something chemical happens to flour when it's mixed with a liquid and secondly, that the next time I wonder why no one has thought of my great idea, maybe I should re-think it myself.

I've made many more gravies since then; some perfect, some not, but I just consider it all practice. The formula is pretty basic, so I think it all comes down to technique when trying to make good gravy: Equal amounts of flour and fat, preferably meat drippings, and several minutes of constant whisking.

When I make something like a braised pot roast, I turn all the liquid into gravy. I combine about a 1/4 cup of flour and 1/4 cup cold water in a separate container, and then add in a touch of the hot cooking liquid to heat up the water. Then, while whisking the cooking liquid, I slowly pour the mixture into the pot. Cook and whisk over a medium heat until the cooking liquid thickens to my liking. This usually takes only a few minutes. When making turkey or chicken gravy to be served on the side, I make it from a small amount of the drippings, in a separate pan on the stove.

Practice is the key to good gravy, but until I get it right every time, I'm happy to note that a few lumps here and there seem to go fully unnoticed at my table of gravy goblins.


Basic Homemade Turkey Gravy

4 Tablespoons of the pan drippings (strained, if desired)
4 Tablespoons all-purpose flour
2 Cups liquid (water, broth or milk)

Heat the pan drippings in a saucepan over medium-low heat and then sprinkle the flour over the drippings. Cook and whisk this mixture until it's combined and the flour begins to cook. When the flour is cooked (about 1 minute), remove the pan from the heat and slowly pour the desired liquid into the pan, while whisking constantly. When the liquid is combined, return the pan to the heat and continue whisking until the gravy is your preferred consistency. If it's too thick, whisk in a little more liquid. If it's too thin, combine 1-2 Tablespoons flour with an equal amount of cold water. Add in a touch of the hot gravy, to bring the water up to temp, and whisk into the pan.

Yield: 2 cups

Wednesday, October 20, 2010

A is for Apple!


Caramel Apples
Posted to Food.com by B.B.Grimm


Although apples grow all year round, September through November is considered the apple season, and with over 7000 varieties, there is an apple for every taste and every purpose imaginable.  Apples can be used in everything from beverages and desserts to savory dishes.  John Chapman, better known as Johnny Appleseed, spent 49 years of his life growing apples over as much of the country as he could.  His goal was to teach everyone to grow apples so that no one would ever go hungry.  He walked his way through Ohio, Michigan, Indiana and Illinois planting apple trees, creating orchards, teaching folks to cook with apples and giving away seeds, so others could plant trees and share the seeds as well.  Best grown in temperate climates, Washington State now grows over 50% of the nation's apples.  Apples have many healthful properties; growing up we heard the saying, "An apple a day keeps the doctor away."  And as legend goes, Johnny Appleseed's first illness was the cause of his death at age 71!
This month we have been experimenting with apple recipes and we've made treats for kids and adults, beverages and delicious dinners, all featuring apples.  I'd like to share a few of our favorites with you today.

During the holidays we've always bought sparkling apple cider for the kids to enjoy and now we've been able to enjoy it homemade with a popular German recipe, posted on Food.com by a good friend of mine, NorthwestGal.  We've made this recipe with apple juice, fresh cider and even cranberry juice!  For our last football get together with our cousin, I made this Apple Pecan Torte.  It's very easy, despite the long list of ingredients and was a big hit with everyone.  And of course, it's not Halloween without a good caramel apple!  Enjoy!


Apple Ladybug Treats
Posted to Food.com by Sharon123


Apfelsaftschorle (Sparkling Apple Juice - Homemade)
posted by NorthwestGal

12 ounces frozen apple juice concentrate
36 ounces club soda (fill juice can 3 times)

Empty undiluted frozen apple juice into decorative pitcher or 2-quart serving carafe. Fill juice container with club soda (3 times) and pour into the pitcher; stir well.  Chill, and serve in fluted champagne glasses.

Apple Pecan Torte
My version, inspired by Apple Torte posted by dawnab


Crust:
8 ounces butter, softened
2/3 cups sugar
1/2 teaspoon vanilla
2 cups flour

Filling:
8 ounces cream cheese, softened
1/4 cup sugar
1 teaspoons vanilla
1 eggs

Topping:
2 apples, peeled, cored and sliced (I like Granny Smith)
1/2 teaspoon lemon juice
1/3 cup sugar
1 teaspoon cinnamon
1/8 teaspoon fresh grated nutmeg (or 1/4 teaspoon dried)
1/2 cup chopped pecans

Crust: cream butter and sugar, add vanilla and mix well.  Add the flour and blend until crumbly.  With flour-dusted fingers, press the mixture into the bottom and 3/4 up the sides of a 9- inch springform pan.
Filling: Beat cream cheese and sugar together and then add the vanilla.  Add the eggs and beat well  Pour over the crust.
Topping: Toss the apple slices with the lemon juice, sugar, cinnamon and nutmeg.  Arrange the coated apples on top of the cheese mixture.  Sprinkle the top with chopped pecans.  Bake at 350 for 45-60 minutes or until center is set and the crust is lightly browned.  Cool on wire rack for 1 hour, then refrigerate several hours or until serving time.

Dinnertime Superhero!


Photo by Lorilyn Tenney (*Tink)


Any recipe that I can use in more than one way gets VIP status in my house. Some days just get away from me. You know the ones. I may wake up early; even get a little work done before the rest of the alarm clocks in the house go off. Then my teenager ignores his alarm and doesn't get up for school until five minutes before the bus will be showing up... six blocks away. Instead of rushing to get ready though, he moseys in to me and asks if he can borrow the car. As I think about his request, I realize I have a doctor appointment, a package to Fed-Ex and a toddler to drop off at preschool, not to mention everything I need to do at home. I begin my denial with an apologetic, "Oh. Honey, I have to..." and that's when he disappears from the doorway, leaving me to wonder, "Just how do I expect to get it all done?"

Recipes like lasagna, quiche, hamburgers or meatballs are excellent for putting together, freezing and then baking when you need them. And now, my friends, you too can cover up the fact that you didn't even think about dinner until the rest of the family was on their way home! Because who's going to believe that at the last minute you had time to make homemade dinner rolls or hamburger buns? Well, I will. But that's just between us.

It all started on a beautiful spring day in May of 2009. I had ground beef thawed and ready to transform into mini-meatloaves. It's rare for my family to argue with me about what I'm making for dinner. And considering some of the strange recipes I ask them to try, when they do oppose my standby recipe choice, I tend to listen. So meatloaf was out and Bryan suggested grilling hamburgers instead. I told him to fire up the grill before I realized we had no buns. I quickly ran to the computer and found this Taste of Home recipe for 40 Minute Hamburger Buns, posted to Food.com by Marie. Dinner was on the table in less than an hour, with homemade burgers and buns! I've been using this recipe ever since, for burgers, sloppy Joes, soups, hot dogs and shredded pork or beef sandwiches.

Not that these buns need any help, but I recently found a recipe posted to Food.com by Brenda. It's one she created at home, out of her love for the King Arthur brand Everything Bread and Bagel Topping. I whipped up a batch of 40 Minute rolls, using this topping, to accompany dinner. My family thought I was a genius! They could be right, but I'm not one to brag. Living up to its name, this Everything Topping is great on everything from loaves of white or wheat bread to bagels and rolls. Even for the beginning baker or yeast-o-phobic, these recipes can turn you into a dinnertime superhero!

40 Minute Hamburger Buns
Recipe posted by Marie, Photo by Lorilyn Tenney (*Tink)


Everything Topping - Bagels, Rolls, Bread
Recipe by Brenda., Photo by Lorilyn Tenney (*Tink)

Sunday, October 3, 2010

Karen's Skillet Lasagna - A busy day life saver!


This is a milestone year for our family.  At the same time we are sharing Sophie's joy and excitement for preschool, we find ourselves struggling to get through Nick's senior year with our sanity intact.  I can multitask, sure, but the work involved in senior year is daunting.  Senior government projects and presentations, community service projects, photos, announcements and of course, the senior apparel.  Not only is it time consuming, but it's all adding up very quickly, and to be completely honest, I'm overwhelmed.  We've had four photo sessions.  One for each kid through the school and one for each through a portrait studio.  It might sound a bit overkill to have that many photos but I've lost some confidence in the photo studio that contracts with the schools. 
Nick's senior school pictures were taken when we went to the school for registration.  The students file into a classroom set up like a photo studio, while the parents wait outside.  I've obeyed this rule for the last 3 years, resisting the temptation to chase behind him, yelling out instructions on how to avoid a goofy smile.  But this year is his last, so I did just that.  I followed him in, telling him to smile, but not smile and at the last second I realize he's wearing a ridiculously oversize baseball cap, sideways.  "Get rid of that thing!" I shout. 
Last week the photos arrived and we all fell in love with his pose.  The best one yet (thanks to me), but there was just one little problem... the lighting.  He looked like he had two black eyes, in the hideously green stage of healing.  Add that to the green cast over his chin and around his mouth and he looked like the Incredible Hulk!  I couldn't send these photos out to his grandparents, unless maybe I had Nick autograph them all, "Lou Ferrigno" first.  The replacement package was just as bad as the first, so they were all returned and we had professional photos taken instead. 


With all this excitement, my fridge is bare.  I feel like I have no time and no energy to shop or cook.  If there was one thing I'd never want to admit, it's that I still like to eat the chili macaroni and lasagna flavors of Hamburger Helper once in a while.  They're convenient to have on hand and quick to make on busy nights.  But the preservatives and sodium content in the spice mixes have prompted me to find other alternatives.  One handy recipe we really enjoy  was created by an online friend, kzbhansen.   It's so easy and versatile that whenever I need a quick meal, I know I can whip this one up with whatever I have on hand.  I sometimes use green or red pepper in place of the mushrooms, broken lasagna noodles instead of the Mafalda (which I've never been able to find anyway), Mexican four-cheese blend instead of all cheddar and I always serve it with cottage cheese.  It tastes like lasagna without all the prep work.  If you miss the baked cheese layer, you can transfer the cooked meat and noodles to a casserole dish, sprinkle the cheese on top and then broil it for a few minutes, or until the cheese is melted and slightly browned. 

Karen's Skillet Lasagna


1 lb ground beef
1 medium onion, chopped
3 cups mafalda noodles (Mini Lasagna noodles)
1/2 teaspoon italian seasoning
1 garlic clove, minced
1 (4  ounce) can sliced mushrooms, sliced
1 (26  ounce) can pasta sauce
2 1/2 cups water
1 cup cheddar cheese, Shredded

Brown beef and onion in 4 quart Dutch oven over medium heat until no longer pink, drain.  Stir in remaining ingredients, except for the cheese.  Heat until boiling, stirring occasionally, then reduce heat and simmer uncovered 10-12 minutes or until pasta is tender.  Sprinkle with cheese and serve.  Serves 4-6

Monday, September 20, 2010

Braided Challah Bread


I love baking my own bread and I don't mind kneading it myself, but I usually just let the stand mixer do the heavy work. About 10 years ago I decided I needed to own an automatic bread machine.  You can't beat it if you only have five minutes to spare for prep work but want fresh bread a few hours later.  As it turned out though, I really missed the hands-on part of bread baking.  Eventually it took a backseat to my stand mixer and then was completely lost in the storage area of the garage that I like to think of as the Appliance Graveyard.  While I realize that anything in an area called a graveyard is probably due to be donated or thrown out, I can't seem to do that.  Just as soon as I donate it I'll want to use it.  I know this because once I donated my 20 year old ice cream maker, that had been in the Appliance Graveyard for 10, I found a new ice cream recipe I wanted to make that used a machine.  I'm still mourning the loss of my food dehydrator as well.
Last year my hoarding of the bread machine went from an annoying habit that my husband simply accepts in me to something possibly akin to opening King Tut's tomb, without the curse.  I found a bread recipe that used the bread machine to make the dough and then the shaping and final rising is done by hand.  I remembered that my model has a dough setting on it, but I'd never tried it.  We promptly began excavating for the bread machine. 


I made Bread Machine Honey Whole Wheat Challah bread, posted to Food.com by Rachel Leah D, that uses the machine to mix, knead and rise the dough, then I shape, rise and bake the loaves.  The resulting bread was tender, soft and had a hint of sweetness that compliments both a sweet or savory dish.  While I had intended to make the recipe as directed, I found there were some bumps in the road on the way to my success.  I only had 2 cups of whole wheat flour left, so I had to substitute with some white flour and I learned that my machine is not capable of holding the amount of dough this recipe made.  However, after an exhaustive online search I was able to locate a copy of my machine's long-lost manual and I now know that it makes one 2-pound loaf.

After adding all the ingredients to the machine I pushed the dough cycle button and let it go.  Just under two hours later, I happened to be in the kitchen, preparing my rolling mats for braiding the dough, when the machine showed that it had under 5 minutes left to go.  All of a sudden I heard a muted, yet still loud, "POP!".  Startled, I looked over at the bread machine and saw that the dough had expanded enough to unlatch and push up the lid on it's own! I had dough stuck to every inch of the interior, including the element below the bread container.  At this point I started to reconsider the curse aspect of unearthing my machine. 

The following recipe is my altered version because, as it turns out, we like it best with a combination of white and whole wheat flour and there were no braiding instructions in the original recipe.  I still use the bread machine but have also made the dough in my stand mixer.

Braided Challah Bread
1 1/2 cups warm water
1 egg
1 egg white
2 tablespoons olive oil
3 tablespoons honey
1 tablespoon sugar
2 cups cracked wheat flour
2 3/4 cups all-purpose flour
1/8 teaspoon salt
2 teaspoons active dry yeast (a 1/4 oz. packet)

For bread machine:
Add the first 8 ingredients to the bread machine in the order listed above.  Using a spatula, gently spread the flour out to cover all the liquid and then make a small well in the center.  Sprinkle the salt around the well and then add the yeast to the well.  Set the bread machine on the dough cycle and let it do it's magic. When the cycle is finished, remove the dough to a lightly floured surface.  Knead a bit of flour into the dough to make it workable, divided it into 3 equal pieces.  Divide the first piece into 3 equal pieces and roll them into 10-12 inch long ropes.  Gently squeeze the tops of each rope together and then braid them together.  Repeat with the other two pieces of dough to create three loaves.  Place the braided loaves on parchment lined (or greased) cookie sheets, cover them with a tea towel or foil and allow to rise for 30 minutes. Then bake the loaves at 325 F for 30-40 minutes.  Makes 3 large loaves.
Creative Commons License
TinksTreats by Lorilyn Tenney is licensed under a Creative Commons Attribution-NonCommercial-NoDerivs 3.0 Unported License