Sunday, October 28, 2012

Halloween Hijinx


Sophie and I spent a couple days this week making treats for her friend's Halloween party on Saturday.  I think the sudden rain (after a summer of barely recordable rainfall) wreaked havoc on my body, brain and specifically my gluten free cupcakes.  It's often difficult to bake gluten free while it's raining, so I wasn't too surprised when the first dozen wouldn't set up properly.  I made some temperature and time adjustments and the second pan came out almost perfect.  The third dozen was a completely new batter, with a little tweak, and it was perfect!  After removing the muffin tin from the oven I set a cooling rack over the top of the cupcakes, and then, just like every cake or cupcake before it, I grabbed both the rack and tin and flipped the whole mess upside down.  Or at least I attempted to.... Apparently my hands were worse than I thought, because they didn't hold onto any piece of that puzzle, and everything clattered to the floor in a spray of fresh, hot pumpkin cake.

Interestingly enough, this post isn't about baking.  It's about the decorating of the cupcakes.  You know, the easy part.  Plus, after dropping a dozen perfect cupcakes on the floor, how much worse could it get?  Okay, don't answer that.  This post is more like a warning to those like me, who are always up for trying something new, even if you know that the best idea in a particular situation would be to do what you know.  If you're a Pinterest fan, this is about good pins going bad.

The original plan was to make two kinds of cupcakes.  A chocolate cupcake decorated with chocolate frosting, Oreo cookies and Reese's Pieces (I used M and M's due to nut allergies) to look like owls.  The second cupcake was going to be pumpkin cake with a neon green buttercream swirl and an adorable witch's hat made from decorative cupcake liners.

The owls were fun and adorable.  Sophie did all the decorating herself!  After making these though, I have concluded that the original photo pinned for this treat had to have been Photoshopped.   Not ONE Oreo cookie came apart without leaving cookie specks in the fluffy stuff.

Original Pin:

Our Finished Product:


Even though our owls look like they've had a long night, they were easy, fun and most important of all, Sophie is very proud of her work.



Hoo-Hoo!  Who rocks the cupcakes?!


After the owls turned out so cute we were excited to make the witch hats that we found in this pin:


The plan was to make another batch of buttercream frosting and tint it neon green, but at the last minute I remembered a pin for marshmallow buttercream, so I decided to make that instead.  Here's the original pin.  Note that the photo looks like a classic buttercream consistency.


Unfortunately, the recipe resulted in what I would consider a sugar cookie glaze; definitely not a decorator frosting.  I really wanted the swirled look with the witch hat set on top, but the marshmallow icing was just too soft.  Adding extra powdered sugar made it too sweet, so we opted to spread it on with a spatula and then add the hat.  However, without a tall swirl to support the toothpick inside the hat, the witch hat just sunk down into the icing.  That's when I remembered another pin that I thought I could take inspiration from.

An adorable marshmallow Frankenstein!


I removed the witch's hat from the cupcake.  I stuck a new toothpick into a marshmallow and dipped it into the neon green marshmallow glaze.  Then I dipped the top of the marshmallow into black sprinkles to make "hair", and placed the marshmallow Frankenstein on the cupcake.  I stuck two mini-chocolate chips on the marshmallow for eyes.  It was awesome!  For about 30 seconds.  By then the hair had slid down considerably, and his eyes were floating in a puddle of icing atop the cupcake.  It was disastrous, but I don't give up easy, so I quickly grabbed the witch's hat and plopped it down on top of Frankie's head.  We decided to call it a melting witch.

But, within a few moments the whole thing looked like the series of mistakes it was, and we knew we couldn't pass it off as anything we would be proud of.
So.... onto plan... oh, I don't know.... C or D?  I've lost count by now, and it's going on 10 o'clock, so we've just got to do something quick!

Going with the Frankenstein theme, I knew I'd seen several versions in krispy treat form.  So we whipped up a batch of Rice Krispy treats, cut them into rectangles, and then I spread them with the marshmallow icing while Sophie cut up sour gummy worms for neck bolts.  Then she sprinkled on hair, put M&M's on for eyes and noses and then used a tube of black icing to finish off the eyes and make crooked mouths.


All in all, they turned out really cute.  If I do them again though, I'll make a double batch so I can make each Frankie a little thicker.  This time I pressed them into a jelly roll pan so that I could get as many as I could, but it made them a little too thin to keep from folding over when room temperature.

The party was great and the treats were a hit!  Here's my Spider Girl and her BFF Little Kitty!


Saturday, October 6, 2012

Smoked Tomato Chili


I've been lucky enough to inherit another gadget from my mom.  She gave me her Brinkman charcoal smoker.  A couple friends and I have been buying and enjoying a rarely stocked brand of smoked tomato hummus.  All summer I kept talking about smoking my own tomatoes, dehydrating and grinding them into powder to use in homemade hummus.  When I finally had the opportunity to get the smoker from Seattle to Boise, I jumped at it!  My friend drove up for a family visit and on the way home she stopped by mom's house to pick up the smoker. 

The best part of my first smoking experience was that mom came down to visit a week after the smoker arrived, and we were able to do the testing and creating together!  We smoked lots and lots of tomatoes, jalapenos, a brisket and a chicken.  We made delicious batches of hummus and salsas with the smoked tomato and jalapeno powders.  I've got some more testing to do before I am satisfied with the hummus and salsa recipes, but one recipe that hit the target the first time out was my smoked tomato chili.
I read all about how to make your gas or charcoal BBQ a smoker, and we've smoked fish on the gas grill in the past, but I was still nervous about doing it on anything but a smoker.  The Brinkman is super easy to use, although now that I've had a look at some of the newer, fancier smokers, if I decide to get really serious about this, I might just have to give mom hers back and invest in a new one. 


We smoked several batches of tomatoes.  We tried organic store-bought tomatoes that were large, and we tried home-grown tomatoes that were relatively small.  Although I'd much rather use tomatoes from my aunt's garden, the small ones easily slipped down through the grill racks, while the large, store-bought ones stayed put. 
After washing and slicing the tomatoes, we removed the seeds and placed them cut-side down on the grill grates that were sprayed with non-stick cooking spray.  I simply sliced the jalapenos in half length-wise and put them on cut-side down also, but I think they could smoke whole too.  I left the seeds in the first time, but in the future I think I'll take them out while I'm doing the tomatoes.

The tomatoes smoked for about 3 hours, and since we did several batches we tried different flavors of wood chips, including cherry, apple, mesquite and a combination of mesquite, hickory, oak and cherry.  Our favorite flavor on the tomatoes was the plain mesquite.  After smoking we removed the tomato skins, which mostly just fell off, like when you char a bell pepper in the oven.  Hmmmm..... smoked bell peppers!  :idea:

The smoker can be used with any lighting technique, but mom had bought an electric starter with it, so that's what we used.  I'll be honest, I'm much more comfortable with just another electric gadget than I am lighter fluid and matches.  So, we loaded up the bottom bowl of the smoker with the electric element and a pile of briquets.  The electric element began to glow like an oven or toaster element, and soon the briquettes were glowing and starting to ash over.


When the briquettes were hot enough we removed the electric starter and added either wood chips or wood pellets directly to the briquets.  Then we set in the second bowl above the briquettes and (carefully) filled it with water or another liquid.  You can use any liquid, or combinations of liquid, from water and broth to beer and wine, and even marinades.  We tried several variations over the course of the week.


The fresh garden tomatoes were wonderful, but they were too small to keep from dropping down through the grill grates.  They land in the water bowl below instead of onto briquettes, but I felt like we were losing out on precious tomatoes when it happened.


The organic store-bought tomatoes were large enough to hold their own on the smoker, so we did several batches of those.  I couldn't help but throw on some jalapenos too, just for fun. 


Fun fact: Regardless of my Teflon mouth, biting into a freshly smoked, non-seeded jalapeno was NOT a good idea.  I eat jalapenos with seeds raw all the time!  Why was the smoked one so potent?!  Well, for the first time ever my family got to see me cry from a pepper.  I tamed it with snap peas dipped in buttermilk ranch, but what did my family do?  Laughed their butts off, that's what!


These were our first beef brisket and whole chicken.  With the convenience of two grill racks we could put the meats on the lower rack and continue smoking tomatoes on the upper rack. 


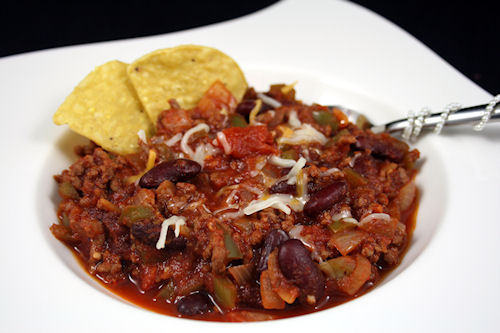
My first perfected recipe creation using our smoked tomatoes is Smoked Tomato Chili


Of course this recipe could be made substituting with smoked paprika or fire-roasted tomatoes, but if you have an outdoor grill at home, I encourage you to try the smoked tomatoes.
For further investigation of the smoking process, feel free to visit the Grilling, Smoking & BBQ Forum at Food.com.

Sunday, August 12, 2012

Salamander Sal comes to Visit...

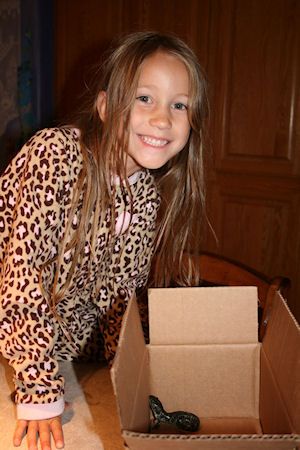
Sophie was so excited for Bryan to get home from work last night.  She's always excited to see him, but this time she couldn't wait to give him the lemon-flavored petits fours we bought to surprise him with.  And by that I mean she couldn't wait to eat them herself. 
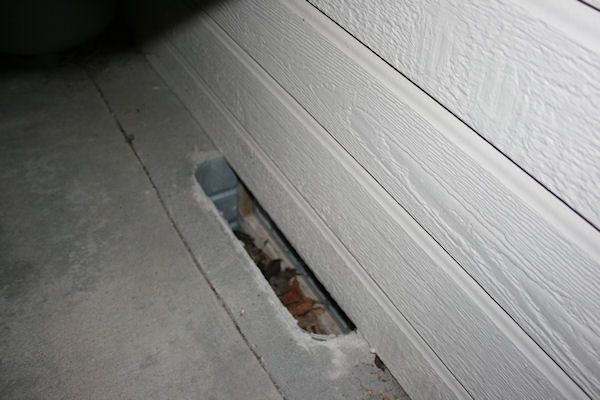
Of course, being his "Friday" night, it was a late one and he didn't get home until about 1am.  About 5 minutes before he arrived Sophie and I had stepped out on the back porch.  We sat for just a minute before we heard a noise like the wind blowing through the trees, yet the night was very calm.  When I looked toward the sound I remembered the mouse I found trapped in a ventilation thingy (I believe that's the technical term) a few years ago.  We call that little area the "Mouse Hole".  The wind blows dried leaves down in the hole, and when a critter gets stuck in there the leaves make a rustling sound as the animal walks around.

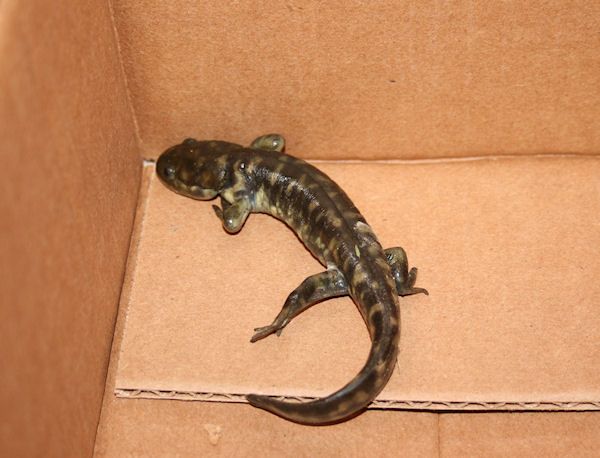
I assumed we had another mouse, but realized it was a lizard (later to find out it's a salamander) when I used my handy iPhone flashlight app to shine light into the hole.  At this point Sophie started freaking out and Bryan was pulling into the garage.  She ran to tell him that we have a lizard (forgetting all about the petits fours!), and hustled him in one door and out the other.  I had went in to retrieve my big camera and started taking photos of the next few minutes.

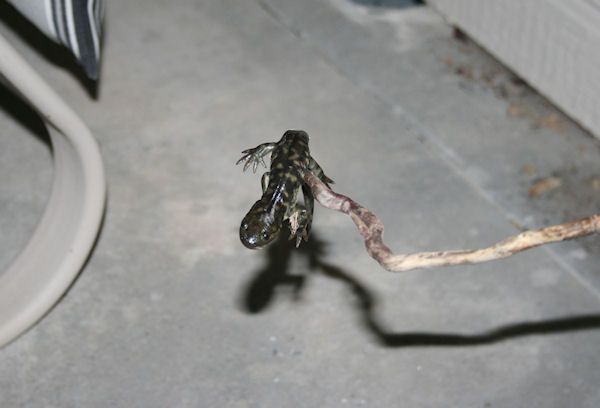
Bryan used a stick to get Sal out of the Mouse Hole.
Then he lowered him to the ground so we could see what he'd do next.
He mostly just sat, but as we quieted down he began to crawl toward the grass.  As we admired how cute he was, we noticed he had something stuck to his left arm.  It looked like an old goat head to me.

When we moved here we had never heard of the Goat Head, also known by other names like Devil's Vine or Puncture Vine.  I just remember Nick's mountain bike bicycle tires deflating at least twice a week.  The poor kid, I was so frustrated that he wouldn't tell me where he was riding that sometimes I'd even yell at him!  He just kept saying, "I'm not going anywhere, Mom.  It's the goat heads.  They're everywhere!"  It was literally years before I understood what he was talking about.
The Puncture Vine and flower actually looks quite lovely.
Then you see the fruit, also called a nut or seed, in it's fresh stage. 
And THEN you see the dried up seed after it falls off the vine.  Clearly the various names this plant goes by are appropriate.


Anyway, I'm pretty sure that our friend Sal has a goat head stuck in his arm.  

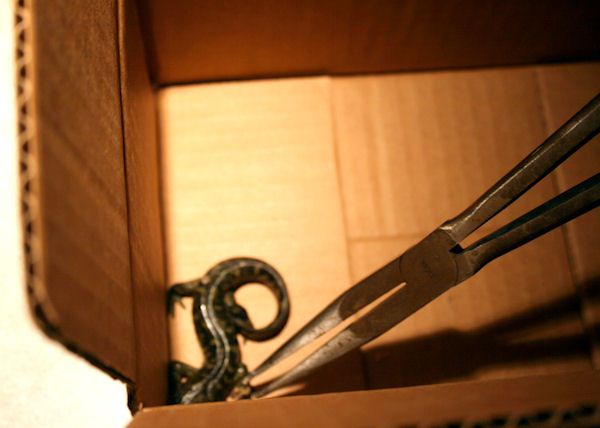
 So Bryan puts him in a little box and grabs a pair of needle-nose pliers to pull out the goat head.  The first chunk was the biggest and didn't seem to bother Sal, but the second chunk was definitely embedded in his arm.  He jumped good when Bryan pulled the spine out.

Surgery was successful!
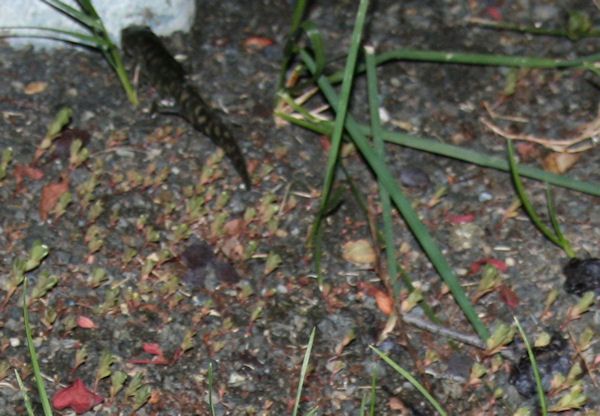
We took Sal out to the front yard and released him under the Mt. St. Helen's Plum tree.  It was pitch black under that tree.  I shot only one photo because after the flash went off a mass of birds living in the tree freaked out, and fled the scene.  Of course, the sound of all the leaves above us moving at once nearly gave us heart attacks.  I'm pretty sure I peed a little.  LOL (just kidding!)

Good luck, Sal!


Saturday, August 4, 2012


This recipe,  Farfalle (Bow Tie) Pasta With Chicken & Sun-Dried Tomatoes, posted to Food.com by Just Call Me Martha, got 7 rave reviews at my house, including two 5 year old girls!  Thanks to a couple previous reviewers, noting the company-worthiness of this recipe, I chose to make it for dinner last night.  Our 5 year old's best friend and her parents were bringing grandma over to dinner and play cards while she's in town.  It's always a little difficult to cook for someone new, and to be honest, I was really nervous this time.  I was choosing a recipe that would normally be on the maybe list for my own family, simply because it's a cream sauce, and in the past we have enjoyed only a handful of white sauced recipes.  I knew I wanted chicken and pasta though, so the sun-dried tomatoes and the previous reviews pushed me to give this one a shot.  I cannot tell you how happy I am!  This recipe is SO simple to prepare.  It really does only take 10 minutes to get the onion, garlic, herbs (I used fresh basil), tomatoes, and chicken prepped.  The cooking is so easy that I was stirring the chicken/cream mixture and the boiling pasta in between hands of cards, and the end result tastes like you worked all day on it.  The sun-dried tomatoes aren't overpowering, even though I probably used an ounce or so more than called for, and the only thing we needed at the table was more salt & pepper.  Following is my version, which calls for a cup less of cream, crushed red pepper and extra sun-dried tomatoes.

Farfalle (Bow Tie) Pasta With Chicken & Sun-Dried Tomatoes
1 tablespoon olive oil
1 lb boneless skinless chicken breast, cut into strips
2 onions, finely diced
3 ounces sun-dried tomatoes, julienned
2 Tablespoons fresh basil (or 1/2 teaspoon dried)
1/4 teaspoon thyme
1/4 teaspoon oregano
1 tablespoon minced garlic
2 cups heavy whipping cream
salt and pepper, to taste
1/2 cup grated Parmesan cheese
1 lb farfalle (bow tie) pasta

 In large skillet, heat olive oil over medium high heat.  Add the chicken, onions, sundried tomatoes, basil, thyme, oregano and garlic.  Sauté until chicken is almost cooked through, and then slowly stir in the whipping cream and Parmesan cheese.  Bring mixture to a simmer, and continue to cook (stirring occasionally) until slightly thickened.  Add salt and pepper to taste.  While chicken mixture simmers, bring water to boil in large pot, and cook the pasta until al dente; drain. Serve pasta and sauce with a sprinkle of freshly grated Parmesan cheese, black pepper and a sprig of fresh basil.

Wednesday, July 25, 2012

Hard-cooked eggs using a silicone veggie steamer


Thanks to a recommendation by Connie Lea in the Gadget Forum of Food.com, on hard-cooking eggs with a steamer, using the Steamed Eggs (Kai Meung)  recipe posted by Peter J, I think I've found the best way to cook and peel them without over-cooking or tearing the whites into a million bits.

I've tried so many tips and techniques over the years, but this is the recipe that's impressed me the most.  Often I find that even though peeling is easier, a little over-cooking usually happens.  Most recently I tried Hard Cooked Eggs in the Oven (Baked Eggs), and although results were nearly perfect, there are still some adjustments to be made to avoid over-cooking, which adds a grayish tinge around the outer edges of the yolks.

A few years ago I received a silicone vegetable steamer as a gift, but I've never really made use of it.  Well, except it does make a nice buffer between my deep-dish glass pie plates.  :D


I would have tested this recipe using an electric steamer/rice cooker, but that broke long ago and hasn't been replaced yet.  So, I pulled out the silicone steamer and decided to give it a test run.  It's basically the same idea as the metal steamer basket I grew up seeing in my mom's kitchen, except it's safe to use in a non-stick pan. 


I added approximately a cup of water to the pan, although I didn't measure it.  I just made sure that the water was high enough to boil, but low enough to avoid touching the basket.  Turn the burner on high, put a lid on it, and bring the water to a boil.  It took just minutes to bring this small amount of water to a boil.  Definitely a plus when making hard-cooked eggs in a hurry!  ;)


Put your room temperature eggs in the basket and replace the lid.

Steam the eggs for 12 minutes.  When the timer rang I moved the pan off the heat and removed the lid.  Allow the eggs to cool for 15 minutes.  Run under cold water, crack and peel.
I loved that the yolks were nicely centered and there is absolutely no sign of overcooking.  The eggs had a little creamier texture than the baked ones, and not at all rubbery like boiled eggs always are.


Besides deviled eggs, which always have to have bacon in them at my house, and traditional egg salad sandwiches, my family really enjoys this recipe for Tuna Egg Salad posted by BreLeigh


And one of my favorite Taste of Home breakfast recipes for Bacon 'N' Egg Lasagna (photo courtesy of Lori Mama)

What's your favorite method for hard-cooking eggs, and your favorite ways to use them?

Saturday, June 16, 2012

Father's Day 2012


I wish I could say that I've been planning a gift for Father's Day... you know, since last month. But I'd be lying. Often I will start thinking and working on things way early, but I don't seem to get anywhere until the last minute. I guess I just work a little better under pressure.

So this morning, I am surfing the web and find the cutest idea for a Father's Day gift for anyone with 3 small kids. Sure, I have two. But seeing as how they're 14 years apart, and one is out of the house, I kinda think of them both as only children. So, I take this idea and twist it around until it works for me and Sophie to do.

I'd love to give credit for the original idea, but I can't for the life of me remember the name of the blog, or find it again. The original blogger took a photo from the knees down of each of her 3 children, wearing the same pair of their father's work boots. The best photo was the last one. The only one young enough for diapers and the boots came all the way up to the bottom of the diaper. So funny!
Even though that was so cute it was giggle-worthy, the sentiment was a very serious biblical quote. I don't know the quote myself and didn't plan on using it, so I don't remember it either.
If anyone knows who's blog that idea was on, please leave it in the comments section and I'll be more than happy to link it here. :)

Anyway, since I don't have 3 kids to use for this idea I started thinking about how to do it with just one. I let Sophie pick out a pair of shoes, a shirt and a hat of Bryan's. Then I took photos of her in each item, uploaded the photos and converted them to black and white. I printed out the photos on glossy photo paper, cut them to size, and came up with the saying, which I then printed out on white card stock. I gathered a thick black frame I had stuffed in the craft room closet, a piece of red card stock (cut down to the same size as the fake photo insert the frame came with), and some double-sided tape. Then I mounted the photos and the saying onto the red background. As Sophie would say, "Waalaa!"

I think Daddy's really going to love this one. And it occurs to me now that I DO know why I can't ever get anything done before the last minute! I have a hard time not giving the presents out early. In fact, I'll be struggling not to give him this gift tonight instead of waiting until tomorrow. LOL

Here are a couple of the other photos I took but didn't make it into the final project.


Friday, June 15, 2012

Orange Cream French Toast


My family loves all things syrup related. Of course, anything that can be eaten with syrup can be eaten with jam, right? I grew up with the jam or syrup option on the table, and since I think options are a good thing, I love trying different flavors of jam and syrup. So, imagine my surprise when I discovered that my five year old thinks the pancakes, French toast or waffles are the optional ingredients.

Yes, one random afternoon I walked into the kitchen to find Sophie standing on a chair with her head in the pantry, drinking maple syrup straight from the bottle! I began hiding the syrup as if it was a key to the liquor cabinet. I considered putting a Mr. Yuck sticker on it too, but realized that might send a slightly mixed message next time I tried pouring it over her pancakes.

A month or so later I was searching for recipes to use up a crate of fresh Florida oranges, and I found a delicious French toast recipe. The Orange Cream French Toast from the Timberwolf Creek Bed & Breakfast in Maggie Valley, North Carolina, was posted to Food.com by Sharon123. It's orange, it's cream, it's stuffed... does breakfast get much better than that?

I think real vanilla is a must for this recipe, so I used my own homemade Madagascar vanilla bean vanilla, along with the fresh orange zest, and we were not disappointed. Bryan was going to be the hardest to impress with a French toast recipe, because he tends to be more of a pancake guy. So, I knew this was a good recipe when he requested it again before I'd even tasted it myself! Sophie said the filling tastes like frosting and we all agreed that it tasted a bit like a frosting we would use on orange cinnamon rolls.

I meant to slice my French bread thick to make plenty of pocket room, but the loaf was sold sliced, and I didn't notice it until I was home. I made pockets in the bread as best I could, and then used a pastry bag fitted with an open star tip to fill them. The only real bump in the road was when I realized we were out of maple syrup. I gave my family some options that included both my favorite ginger syrup and blackberry syrup, but they declined everything after trying their first bite with butter only. They found this recipe to be so well balanced, that syrup was not required! Bryan said he probably won't even bother with the maple syrup next time. I was impressed that this recipe was flavorful enough to enjoy without syrup, but since orange and ginger is a classic flavor combination, I topped mine with the ginger syrup, and found it to be absolutely delicious as well.

If you don't have a pastry bag or decorating tips for filling, it's not a problem. Feel free to use a Ziplock bag with a corner snipped off, or simply use the orange cream as a spread when the French toast is hot off the griddle. This versatile recipe went immediately into our "Best of 2012" collection and I hope you will enjoy it just as much as we did! Following is my interpretation and instructions for the recipe.

Orange Cream French Toast
1 loaf day-old French bread
8 ounces cream cheese, softened
1/4 cup powdered sugar
1 1/2 tablespoons sour cream
1 orange, zest of
½-1 teaspoon real vanilla
6 large eggs
1 1/2 cups milk (approximately)
1-2 Tablespoons vegetable oil
1/2 teaspoon cinnamon
1/8 teaspoon nutmeg
Powdered sugar, for dusting
Orange slice (optional garnish)

The night before you make the French toast: Use an electric mixer to combine the cream cheese, powdered sugar, sour cream, vanilla, and the orange zest. Cover and store in the refrigerator overnight.
In the morning, crack the eggs into a glass measuring cup, measure, and then pour in an equal amount of milk. Whisk eggs and milk together with a dash of vanilla, and then pour mixture into a deep, flat bowl or a pie plate. Pour about a Tablespoon of vegetable oil onto a folded paper towel and spread the oil over the surface of the griddle. Pre-heat the griddle on medium heat or to about 350°. Slice the day-old French bread into 1-1/2 inch thick slices. Cut a pocket into each slice and fill generously with the cream cheese mixture. Dip the slices into the egg mixture, turning to coat both sides, and then place on the griddle to cook for about 2-4 minutes. Combine the cinnamon and nutmeg, and sprinkle the cooked side of each slice with the spices before turning to cook for another 2-3 minutes, or until golden. Dust cooked slices with powdered sugar, and garnish with a fresh slice of orange, if desired. Serves: 4
Creative Commons License
TinksTreats by Lorilyn Tenney is licensed under a Creative Commons Attribution-NonCommercial-NoDerivs 3.0 Unported License