Saturday, February 19, 2011

Getting Skinny with Soups!


According to scientists who have studied how the body responds to the same meal eaten in two different forms, soup can help you lose weight.

Let's imagine a meal for two of poached chicken, fresh vegetables and a glass of water.
Subject #1 eats the meal and drinks the water as served.
Subject #2 combines the three components into soup.

On the outside of our body they're both the same meal, besides eating one with a fork and the other a spoon. But on the inside they are completely different. Your body will process the two meals differently and using MRI and ultrasound technologies, scientists have been able to see what happens to the meals once they leave our plate.

When Subject #1 eats the food and drinks the water, the food and water will enter the stomach together, but the food will be stopped by the pyloric sphincter at the bottom of the stomach, while the water passes straight through to the intestines. While the food is being broken down by digestive juices, Subject #1 will feel full; for approximately 2 hours.

When Subject #2 eats the food and water combination as a soup, the stomach reads all of it as food and everything stays in the stomach to be broken down. The subject will feel full up to an hour and a half longer than the subject eating the solid food plus water.

All this magic happens in the stomach and starts with a little hormone discovered in 1999 called, ghrelin. Ghrelin is constantly released by special cells in the stomach wall whenever the stomach is empty and while traveling through the blood stream, ghrelin heads straight for the hypothalamus part of the brain; our body's appetite center. When Ghrelin reaches its destination, the hypothalamus sends out messages that we're hungry.

However, if the stomach wall is stretched and full, ghrelin is not produced. Consequently, the hypothalamus does not send out signals that we need to eat.

Ghrelin has another job as well, and that is to promote fat storage and inhibit stored fat breakdown in times of hunger. This may explain why some sensible diets that have the "six small meals a day" philosophy can prove successful.

Let's keep this little gremlin, I mean, ghrelin, at bay by eating more soup!

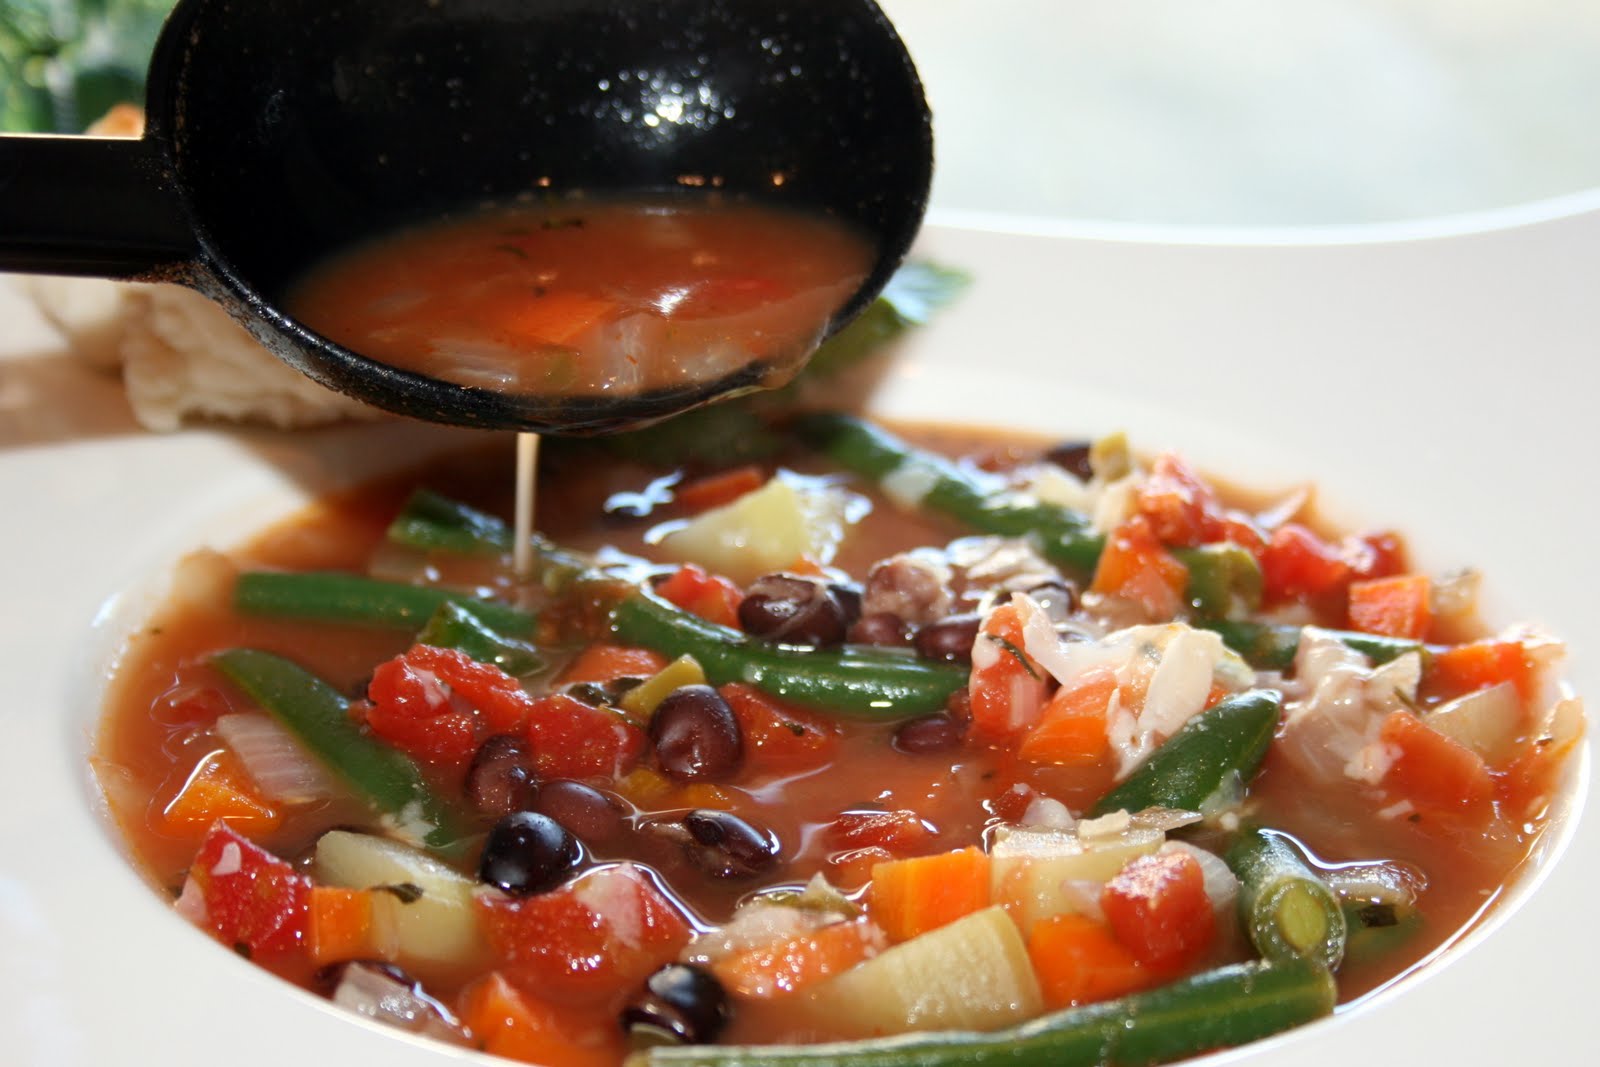
I just recently discovered No Guilt Soup posted to Food.com by TLu and by substituting fresh vegetables and dried beans instead of canned, the sodium can be reduced even more!

Sunday, January 30, 2011

Homemade Refried Beans


I've mentioned before that I tend to hang on to everything. My sister is always encouraging me to de-clutter my house by getting rid of anything I'm not using. I donate a lot, every month we have stuff to give away, but my argument for keeping some things is that maybe someday I can repair or re-purpose them. And it does happen... occasionally.

Last night my teen and I were gathered around the kitchen island developing a recipe for homemade re-fried beans. We would add an ingredient, pulse the processor, taste the result and repeat. About halfway into the recipe I pushed the button to combine the most recent addition and the processor did not whir into action. I unplugged it, plugged it back in, pushed every button combination possible, and still nothing. Normally, at this point I would lovingly pack up the machine and find a spot for it in my Appliance Graveyard, also known as the garage, hoping to have it repaired in the future. But this time I decided I was just going to face the fact that I'll never get it repaired, because it's already 10 years old and I'd probably have better luck just buying a new model. So, I picked up the heavy, motor-containing base and hauled it straight to the 96 gallon garbage can that had just been emptied that morning.
It made an awful bang and a crunch as it hit bottom. I hate to admit that the sound was sort of satisfying, since after all, it was its fault that I'll be mashing and stirring by hand for another 30 minutes. But at the same time I felt a pang of guilt for not giving my faithful KitchenAid processor its rightful spot on the retired appliance shelf.

Of course, there's no turning back now, so I returned to the kitchen for the accessories and tossed them in, with slightly less aggression.
Now, washed up and back to mixing, my teen and I discussed the sadness I felt over the sudden loss of my food processor. Okay, he looked at me like he was evaluating which level of security I'd qualify for in the loony bin, as I babbled on about how it had been a good machine for all these years, but it had a couple things I didn't totally love, but it always made a great pie crust...
Finally, the mixing was over. We had tasted and adjusted the re-fried beans to our liking, and now it was time to make some cheese and bean tostadas. I pulled my favorite (20 year old) griddle down from the top of the fridge and plugged it in at the kitchen island. I turned the dial to 375° and... nothing. No light, no heat, nothing.

I looked at Nick with saucers for eyes and he began to laugh. In between near hysterical squawks he managed to get out something like, "What are the chances that you would blow up two appliances in one night?!"
That's when I felt the shock on my face turn to complete horror, as I realized what had just happened. I looked back at him and repeated what he had said, emphasizing the TWO appliances part. His laughing stopped abruptly and his face mirrored the horror on mine for just a moment before changing to something that can only be described as resignation. He got up from the island and calmly said, "I'll go get it."

Just three dumpster diving trips, a couple scrapes on his torso and one on his arm, and we had all the parts and pieces back. You don't want to know what the processor looked like, but note that it cleaned up well and believe it or not, still works like a champ! As does Nick... well, the clean up part anyway. We moved the griddle to another outlet, crisped up a few corn tortillas, spread them with our Trip the Breaker Re-Fried Beans, topped it all off with shredded cheese and slipped them under the broiler until the cheese melted. Delicious, nutritious and an exercise in temperance!

Homemade Refried Beans (Gluten Free)

2 cups dried pinto beans
1 1/2-2 cups chicken stock
2-4 cups water
1/2 tablespoon olive oil
2-3 teaspoons tomato paste
1/2 tablespoon white vinegar
3 tablespoons onions, finely chopped
1 small jalapeno, seeded and finely chopped (optional)
1 garlic clove (or 1 teaspoon garlic powder)
1/8 teaspoon sea salt (or to taste)
1/8 teaspoon cumin
1 1/2 teaspoons chili powder

Sort through dried beans and remove any pebbles, off-colored beans or debris. Rinse thoroughly and drain. Put beans in crock pot, add chicken stock and enough water to cover beans by about 3 inches. Cover and cook on low 6-8 hours or until tender.
Drain beans, but reserve 1 cup of cooking liquid and set aside. Reserve about 1/2 cup of cooked beans and place the rest into food processor (or a large bowl to mash by hand). Pulse a few times and then add oil; process to incorporate. Add tomato paste, vinegar, onion, jalapeno, garlic, salt, cumin and chili powder; process until smooth and combined. Add reserved beans and pulse a couple times; just enough to break them up. Serve as desired.

Sunday, January 23, 2011

The Great Beanie Brownie Experiment!


Brownies and donuts are like Kryptonite to my will power. I'm always testing or creating a new recipe and a few years ago, black bean brownies became one of the many unusual-ingredient recipes that I challenge myself to try once in a while. They were good, but at the time, altering or creating new recipes with black beans just wasn't a priority for me. However, I've been experimenting with gluten-free baking for a couple of years now and my interest was piqued again by the beanie brownie when I realized that many black bean brownie recipes don't call for flour; therefore, by default they're gluten-free. I've been calling recent weeks in my life, "The Great Beanie Brownie Experiment".

The real benefit of using black bean puree in brownies was replacing the fat in the recipe, making the brownies lower in fat... and dare I say, healthy! All kinds of beans contain dietary fiber, protein and no fat or cholesterol. So what better way to get your kids to eat a very healthy food, than hide it in their snacks? It's a win-win situation. In my case, my toddler who is learning to assert her independence wants to only eat two bites of dinner and then move on to dessert. I want her to eat six bites of dinner before dessert. Well, now I can accept two bites of dinner, knowing that she's getting 13 grams of fiber and 20 grams of protein in that deliciously moist, chocolatey brownie! Sure, she leaves the table thinking she's pulled one over on mom. But as a parent, we have to pick our battles, right?

We don't have to limit ourselves to brownies though. Pureed beans can be substituted for all or part of the fat (shortening or oil) called for in a recipe, and make other goodies low-fat or even fat-free. Cannellini, great Northern and small white navy beans are great choices for homemade or boxed brownies, quick breads or muffins. Either canned or dried beans can be used. Dried have zero salt and are cheaper to purchase, but will require a little extra planning. When using canned beans, simply drain and rinse the beans well, then proceed with the recipe. To use dried beans, follow these three steps the day before you want to make the dessert:

1. Put 1 cup of dried beans in a bowl. Sort through the beans and remove any rocks or discolored beans. Add two cups of water and soak the beans overnight.
2. In the morning, drain the soaking water and gently rinse beans. Put the beans into a medium saucepan and cover with two cups of fresh water. Bring to a boil and cook until beans are soft. Or, put them in a crock pot and cook on low for six to eight hours.
3. When soft, drain the cooking water, place the beans in a bowl and store in the refrigerator until cool.

To use the bean puree in a recipe that doesn't call for beans, put the cold, cooked beans (or your rinsed and drained canned beans) into the bowl of a food processor, or a blender, and puree until smooth. Add water, a Tablespoon at a time, until the mixture is the consistency of shortening.
Although you can replace all of the fat called for, some recipes do have better results when some of the fat is left in. In 2005, a study was published in the Journal of the American Dietetic Association reporting that taste testers gave the highest ratings for flavor and texture to brownies with only 25% to 50% of the fat replaced with bean puree. And in Pocotello, Idaho, researchers from Idaho State University made a successful cookie with 75% of the butter replaced with beans. The beans helped these cookies go from 150 calories down to 105 and from 7 grams of fat to 3. At these percentages, the beanie brownies and cannellini cookies weren't much different than the full-fat options, except that they were considerably more nutritious.

Sometimes good recipes start with an accident and this is one of those times. I was simply trying to create a white bean brownie with flavors other than just chocolate. The recipe was great the first time out, but since I prefer fudgy brownies, the texture was too cakey for me to actually call a brownie. You can double this recipe to make a 13x9 pan and take it to your next bake sale. No one will ever know they're eating something healthy!

Gluten-Free Cranberry-Orange Beanie Cake

Thursday, December 30, 2010

Learning to Love Lima Beans!


Sometimes I wonder if I missed out on a childhood rite of passage. I mean, aren't kids simply hard-wired to hate Lima beans? Every time I heard the words Lima Bean, they were followed by shrieks of disgust, whether on television or in the lunch line. The strangest part was that even though I was the pickiest eater in town (peanut butter and jelly on white bread, every single day), I seemed to be the only one not fully understanding what was so gross about Lima beans. I quite liked them, in fact.

The only bean that looks like someone with an orange peel smile, Lima beans make ME smile. How can a food that looks like a happy face be threatening? I didn't understand it, but chalked it up to my mom's awesome kitchen skills. Obviously, everyone else under the age of 10 had never tried my mom's recipe for ham and Lima bean soup.

Dating as far back as 6000 B.C., the Lima bean has been cultivated in the tropical climes of South America and the Caribbean. Although known by other names, such as the chad bean, butter bean, haba bean, pallar beans, burma beans, guffin beans and hibbert beans, the common name comes from Peru's capital city of Lima. Just to confuse you further, and I'm not saying that any of my 10 year old friends were right, but the smiley-face bean does have some evil properties. Raw Lima beans (including dried beans ground into flour) contain cyanide compounds that can inhibit digestive enzymes and cause red blood cells to clump together, resulting in sickness or death. However, soaking and cooking the beans before eating them, will kill off these poisonous toxins and render the beans harmless. What you're left with is a delicate, butter-flavored bean with a creamy texture.


Lima beans are actually the seeds found inside a 3-inch long, flat, curved pod. Usually, 2-4 green or cream colored seeds are found in one pod. There are also a few varieties that can be found in other colors, like red, white, black, brown or even purple. As with most legumes, Lima beans are rich in fiber to lower cholesterol and avoid spikes in blood sugar levels. Low in calories and nearly fat-free, they are also an excellent source of the trace mineral, molybdenum, to detoxify sulfites, magnesium for lowering your risk of heart attack and iron for increasing your energy.

While difficult to find in the United States, fresh Lima beans can sometimes be found at farmer's markets, but dried, canned or frozen beans are always available. When choosing the fresh variety, look for pods that are firm and glossy, without wrinkling or yellowing. If the beans have been removed from their pods, inspect them closely for signs of mold or decay. Look for green or greenish-white, unblemished beans.

Until researching these delicious beans, I'd not realized how many ways they can be used. Besides ham or root vegetable soups, they can be pureed with garlic and herbs to make a unique sandwich spread or vegetable dip.
Succotash, a traditional Native American dish, is made from a combination of Lima beans and corn that can be served as a side dish or wrapped in corn tortillas for Lima bean burritos.

Here are a few recipes to kick start your love of Lima beans!


Easy Crock Pot Ham and Lima Bean Soup


Microwave Succotash Photo by Lainey6605


Hillbilly Beans
Butter Bean Dip with Red Onion and Olives
Marinated Bean Salad

Thursday, December 23, 2010

Demystifying the Meat Thermometer


With all the details being attended to during the preparation of your holiday meal, the most important is the main attraction. Be it turkey, ham or roast, if it isn't cooked perfectly when you expect it to be, the whole day feels like a disaster. I've had several Thanksgivings where the turkey didn't get cooked on time.

The year I was 10, our power went out during a snowstorm. My parents packed up everything and we drove to another city to have dinner with friends and finish cooking our turkey in their oven. One year my aunt forgot to turn on the oven. Two hours later my husband asked aloud, "Isn't this thing supposed to be on?". :shock:
And we've had countless Thanksgiving turkeys that just weren't done in the number of hours per pound that the package illustrated.

There is still no way to gauge the exact cooking time, but there is a gadget that will help us be sure when the bird is cooked to a safe temperature, without over-cooking the meat.
Enter the meat thermometer.

These devices once scared me more than the threat of food borne illness! Yep, "When, Where and How", felt like cramming for a college midterm. But by examining the types of thermometers to choose from, we find the answers to these questions.

Instant Read thermometer:


The instant read thermometer is not oven-safe. Don't insert the thermometer until your approximate cook time is reached. Pull the meat out of the oven, just far enough to stick the thermometer into the meatiest part of the bird or roast, without touching the bone, and within about 15 seconds, the thermometer will read the internal temperature.
An instant read, digital thermometer is useful for a wider variety of foods because it only needs to be inserted 1/2-1 inch deep. This makes it possible to read the internal temperature of a meatloaf, casserole or the burgers on the barbecue.

Oven-proof meat thermometer:


A no hassle thermometer, this one is inserted before putting the bird or roast in the oven. Make sure it's inserted in the meatiest part (in poultry it's the inner thigh area, near the breast) and doesn't touch the bone, as bones conduct heat faster and will give a false reading. At the approximate cook time for your meat, checking the temperature reading on this thermometer takes just a quick look.

Meat Probe:

The most advanced meat thermometer available is the temperature probe.


Using a digital probe allows the meat to cook steadily, without opening the oven door between each temperature check. Every time an oven door is opened, up to 5 degrees of heat can be lost, which in turn, extends the over all cook time. A digital monitor sits outside the oven and a temperature probe is inserted into the meat. A long, thin cord attaches the two pieces and runs from the meat to the monitor outside the oven. The oven stays closed, while you easily watch the temperature reach it's final destination.

The most expensive meat thermometer is the probe and sits in the $15-$20 range. The oven-safe and instant read thermometers run in the $3-$6 range.

Beans... Why buy dry?


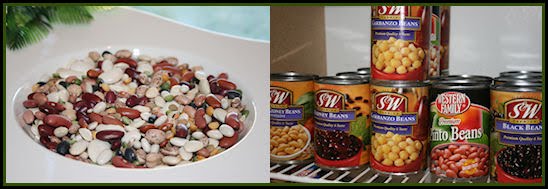
I'll admit, I'm not a very savvy shopper. My sister is relentless about wanting me to use coupons and other discounts or purchasing based on price point. But the truth is, if it tastes good or is required for a recipe, I buy it. However, these days it's almost a necessity to be a little more frugal. One thing I have been paying closer attention to is how much cheaper dried beans are from canned ones. Sure, I still keep the canned beans on hand, but they're not my first choice anymore.

Since my dollar-to-dollar sense is not my strong suit, I won't go into the actual price comparison. What makes sense to me is that it takes three 15.5 ounce cans to equal one bag of dried beans. The canned beans have already been soaked and cooked, which means they've swelled two to three sizes bigger than their dry counterpart. Add in the water and other liquids needed to preserve the beans and there are going to be even less beans filling up the can.

The even bigger bonus for me, is that I don't always want to use the entire can of beans when I'm cooking for just me and my preschooler. DH works nights & DS is often out with friends or away for entire weekends, so when reducing recipes, I can easily stretch one bag of beans out to equal about 6 cans.

The other confession I have to make, is that I'm lazy. I love to plan ahead and I don't mind prepping the day before, but there are busy days when I'll get home and need something quick. Not something that has to soak overnight.

No worries! Dried beans can be soaked at your convenience, cooked and then cooled to room temperature. Then refrigerate the beans for up to four days in a covered container. Use the amount you need in any recipe, just as you would canned beans!

Soaking dried beans for six to eight hours will allow some of the gas-producing carbohydrates to be released, which is best for all, but if you find you don't have that much time, you can still use dried beans by doing a one hour soak. To prepare beans by this method, use a medium saucepan and enough water to cover the beans. Bring to a boil and boil for one minute. Turn off the heat and allow the beans to soak for one hour. Drain and use as desired.

Now, what would a real food comparison be without looking at the nutritional differences?


Regardless of their store-bought form, all beans are rich in soluble fiber, which lowers the level of LDL cholesterol in the blood. Soluble fiber also slows down the absorption of carbohydrates, which decreases the spike in blood glucose levels. Beans are packed with protein, B vitamins and iron and are considered part of the Meat and Beans group, as well as part of the Vegetable group on the Food Pyramid. Vegetarians can fulfill their daily allowance by substituting the beans for meat, while meat-eaters can fulfill their daily allowance of vegetables by substituting beans.

Since canned or dried beans inherently contain the same good stuff, the only real difference is what's added to the canned beans.


The numbers aren't real dramatic, until you get down to the amount of sodium. From zero to 1174 mg of sodium!? Ouch. We all know salt tastes good, but unfortunately, it's not good for us. Salt is already in nearly every processed food we eat and we may not be able to avoid it completely, but we can choose to decrease the amount we take in. To reduce the amount of salt when using canned beans, instead of just draining, rinse them as well.

I don't think there will ever be a time when I don't have canned beans on hand, but just the same, there will never again be a time when I don't have dried beans either. I hope you give dried a chance, if not for the cost savings, or the satisfaction of making a whole recipe from scratch, then do it for your health.

My favorite Bean soup is my 13 Bean Crock Pot Soup posted on Food.com.

Saturday, December 11, 2010

Brining a Turkey


Photo courtesy of Feldstein Photography


Brine is essentially a salt water bath for meat. Turkey is the most common, but you can brine chicken, fresh ham or even shrimp. Brining makes changes in the cellular structure of the meat through the process of osmosis.
Osmosis, by definition is the act of a liquid, usually water that passes through a thin, semi-permeable membrane to equalize the solvent concentration on both sides of the membrane.

Meat contains a lot of water, but only a small amount of salt, so when the meat is submerged in salt water, the solvent concentration is out of balance. To balance it again, the water from the meat moves through the skin and out of the bird, while the salt and any flavors in the brine, will be pulled into the meat.
At first it seems as if we're going in the wrong direction, as we would have salty, dry meat, if cooked right now.
But, we'll give it some time and let the salt do its duty.

The salt, now in the meat, will begin to attach itself to the muscle proteins. The fibers begin to weaken, swell and separate enough to allow more water to be stored in them. So, osmosis happens again to balance out the new concentration and the water in the brine begins to refill the fibers.

When these chemical changes have been made, the meat will have absorbed approximately 10% more water and salt from its original weight.

The changes aren't instant; however, so brining must be done in advance of when you want to roast the meat.
I like to do the brine the day before and refrigerate the meat overnight.

Brined meat will cook faster than if it had been roasted without the brine. Make sure to use a meat thermometer and check the temperature at the earliest recommended cook time. But even if your bird does cook longer than needed, it will still taste moist and tender because of the broken down muscle fibers and the additional water they're holding onto. ;)

Coarse kosher salt is the preferred salt for brining, but table salt (iodine-free) or sea salt can be used. Or, try a combination of flavored sea salt and kosher salt!
Generally, 1 cup of kosher salt for every gallon (four quarts) of water is recommended. Apple or orange juice and flavored vinegars, such as apple cider vinegar or pineapple vinegar can be substituted for a portion of the water.

To balance the salty water, a sweetener should be a part of the brine. Use sugar, brown sugar, molasses, honey or even agave nectar.


Seasonings, or aromatics, are used both in the brine and roasted inside the cavity of the bird. Since only the essence of the seasonings is small enough to pass through the skin and into the meat, your options are wide open. Whole spices and fresh herbs are excellent for brining. No additional salt is needed, but try things like fresh peppercorns, allspice berries, cloves, rosemary, sage, thyme, garlic or ginger. Apples and citrus fruits make great additions to the brine.

Because you'll be marinating a whole bird, you'll need something big enough to hold it. I've used a brining bag and a (very) clean cooler in the past, but it was really only a small investment, about $8, to purchase a 5 gallon bucket with a lid.

The process is pretty simple and I like the fact that it's done the day before. It takes a bit of stress off on the day of the holiday, when so many other things have to be prepped.

I like to buy a fresh, organic turkey, so I don't have to worry about thawing first, but frozen works just as well.
Prepare the brine and then chill it before adding to the bird. Clean out the bird, rinse well and then submerge in the brine with additional cold water. Refrigerating the whole mess can be tricky though. You want to keep the brining bird chilled at 40° F and finding room in the refrigerator for a 5 gallon bucket is no easy task. We have a fridge in the garage and we can take out the bottom shelf to make the bucket fit. But luckily for us, the weather around the holiday season is usually 30° or less, so we've also just put the bucket in the garage overnight.

When it's time to roast the bird, remove from the brine (discard brine) and rinse it really well, inside and out. Pat dry and place in roasting pan.

Now is the time to add the aromatics. The apples, citrus fruits and fresh herbs can be added to the cavity of the bird, then roast immediately. :)

My favorite method of roasting is the high-heat sear at 500° F in the beginning, to create a nice crust over the bird that will lock in the moisture. Then reduce the heat to 350° and continue roasting until the thermometer reaches 160°. Tent the bird with foil and allow it to rest for 15 minutes before carving.


Photo courtesy of Feldstein Photography


Then get ready to enjoy the tastiest, juiciest turkey ever!
My favorite brining recipe, so far... is from Alton Brown's Good Eats show.

Alton Brown's Brined Turkey

1 (14-16 lb) whole turkey, frozen
For the Brine:
1 cup kosher salt
1/2 cup light brown sugar
1 gallon vegetable stock
1 tablespoon black peppercorns
1 1/2 teaspoons allspice berries
1 1/2 teaspoons chopped candied ginger
1 gallon water, heavily iced
For the Aromatics:
1 red apple, sliced
1/2 onions, sliced
1 cinnamon stick
1 cup water
4 sprigs rosemary
6 leaves sage
canola oil

2 to 3 days before roasting: Begin thawing the turkey in the refrigerator or in a cooler kept at 38 degrees F.
Combine the vegetable stock, salt, brown sugar, peppercorns, allspice berries, and candied ginger in a large stockpot over medium-high heat. Stir occasionally to dissolve solids and bring to a boil. Then remove the brine from the heat, cool to room temperature, and refrigerate. The night before you'd like to eat: Combine the brine, water and ice in the 5-gallon bucket. Place the thawed turkey (with innards removed) breast side down in brine. If necessary, weigh down the bird to ensure it is fully immersed, cover, and refrigerate or set in cool area for 8 to 16 hours, turning the bird once half way through brining. Preheat the oven to 500 degrees F. Remove the bird from brine and rinse inside and out with cold water. Discard the brine. Place the bird on rack of roasting pan and pat dry with paper towels. Combine the apple, onion, cinnamon stick, and 1 cup of water in a microwave safe dish and microwave on high for 5 minutes. Add steeped aromatics to the turkey's cavity along with the rosemary and sage. Tuck the wings underneath the bird and coat the skin liberally with canola oil. Roast the turkey on lowest level of the oven at 500 degrees F for 30 minutes. Insert a probe thermometer into thickest part of the breast and reduce the oven temperature to 350 degrees F. Set the thermometer alarm (if available) to 161 degrees F. A 14 to 16 pound bird should require a total of 2 to 2 1/2 hours of roasting. Let the turkey rest, loosely covered with foil or a large mixing bowl for 15 minutes before carving.

Creative Commons License
TinksTreats by Lorilyn Tenney is licensed under a Creative Commons Attribution-NonCommercial-NoDerivs 3.0 Unported License