Thursday, December 30, 2010

Learning to Love Lima Beans!


Sometimes I wonder if I missed out on a childhood rite of passage. I mean, aren't kids simply hard-wired to hate Lima beans? Every time I heard the words Lima Bean, they were followed by shrieks of disgust, whether on television or in the lunch line. The strangest part was that even though I was the pickiest eater in town (peanut butter and jelly on white bread, every single day), I seemed to be the only one not fully understanding what was so gross about Lima beans. I quite liked them, in fact.

The only bean that looks like someone with an orange peel smile, Lima beans make ME smile. How can a food that looks like a happy face be threatening? I didn't understand it, but chalked it up to my mom's awesome kitchen skills. Obviously, everyone else under the age of 10 had never tried my mom's recipe for ham and Lima bean soup.

Dating as far back as 6000 B.C., the Lima bean has been cultivated in the tropical climes of South America and the Caribbean. Although known by other names, such as the chad bean, butter bean, haba bean, pallar beans, burma beans, guffin beans and hibbert beans, the common name comes from Peru's capital city of Lima. Just to confuse you further, and I'm not saying that any of my 10 year old friends were right, but the smiley-face bean does have some evil properties. Raw Lima beans (including dried beans ground into flour) contain cyanide compounds that can inhibit digestive enzymes and cause red blood cells to clump together, resulting in sickness or death. However, soaking and cooking the beans before eating them, will kill off these poisonous toxins and render the beans harmless. What you're left with is a delicate, butter-flavored bean with a creamy texture.


Lima beans are actually the seeds found inside a 3-inch long, flat, curved pod. Usually, 2-4 green or cream colored seeds are found in one pod. There are also a few varieties that can be found in other colors, like red, white, black, brown or even purple. As with most legumes, Lima beans are rich in fiber to lower cholesterol and avoid spikes in blood sugar levels. Low in calories and nearly fat-free, they are also an excellent source of the trace mineral, molybdenum, to detoxify sulfites, magnesium for lowering your risk of heart attack and iron for increasing your energy.

While difficult to find in the United States, fresh Lima beans can sometimes be found at farmer's markets, but dried, canned or frozen beans are always available. When choosing the fresh variety, look for pods that are firm and glossy, without wrinkling or yellowing. If the beans have been removed from their pods, inspect them closely for signs of mold or decay. Look for green or greenish-white, unblemished beans.

Until researching these delicious beans, I'd not realized how many ways they can be used. Besides ham or root vegetable soups, they can be pureed with garlic and herbs to make a unique sandwich spread or vegetable dip.
Succotash, a traditional Native American dish, is made from a combination of Lima beans and corn that can be served as a side dish or wrapped in corn tortillas for Lima bean burritos.

Here are a few recipes to kick start your love of Lima beans!


Easy Crock Pot Ham and Lima Bean Soup


Microwave Succotash Photo by Lainey6605


Hillbilly Beans
Butter Bean Dip with Red Onion and Olives
Marinated Bean Salad

Thursday, December 23, 2010

Demystifying the Meat Thermometer


With all the details being attended to during the preparation of your holiday meal, the most important is the main attraction. Be it turkey, ham or roast, if it isn't cooked perfectly when you expect it to be, the whole day feels like a disaster. I've had several Thanksgivings where the turkey didn't get cooked on time.

The year I was 10, our power went out during a snowstorm. My parents packed up everything and we drove to another city to have dinner with friends and finish cooking our turkey in their oven. One year my aunt forgot to turn on the oven. Two hours later my husband asked aloud, "Isn't this thing supposed to be on?". :shock:
And we've had countless Thanksgiving turkeys that just weren't done in the number of hours per pound that the package illustrated.

There is still no way to gauge the exact cooking time, but there is a gadget that will help us be sure when the bird is cooked to a safe temperature, without over-cooking the meat.
Enter the meat thermometer.

These devices once scared me more than the threat of food borne illness! Yep, "When, Where and How", felt like cramming for a college midterm. But by examining the types of thermometers to choose from, we find the answers to these questions.

Instant Read thermometer:


The instant read thermometer is not oven-safe. Don't insert the thermometer until your approximate cook time is reached. Pull the meat out of the oven, just far enough to stick the thermometer into the meatiest part of the bird or roast, without touching the bone, and within about 15 seconds, the thermometer will read the internal temperature.
An instant read, digital thermometer is useful for a wider variety of foods because it only needs to be inserted 1/2-1 inch deep. This makes it possible to read the internal temperature of a meatloaf, casserole or the burgers on the barbecue.

Oven-proof meat thermometer:


A no hassle thermometer, this one is inserted before putting the bird or roast in the oven. Make sure it's inserted in the meatiest part (in poultry it's the inner thigh area, near the breast) and doesn't touch the bone, as bones conduct heat faster and will give a false reading. At the approximate cook time for your meat, checking the temperature reading on this thermometer takes just a quick look.

Meat Probe:

The most advanced meat thermometer available is the temperature probe.


Using a digital probe allows the meat to cook steadily, without opening the oven door between each temperature check. Every time an oven door is opened, up to 5 degrees of heat can be lost, which in turn, extends the over all cook time. A digital monitor sits outside the oven and a temperature probe is inserted into the meat. A long, thin cord attaches the two pieces and runs from the meat to the monitor outside the oven. The oven stays closed, while you easily watch the temperature reach it's final destination.

The most expensive meat thermometer is the probe and sits in the $15-$20 range. The oven-safe and instant read thermometers run in the $3-$6 range.

Beans... Why buy dry?


I'll admit, I'm not a very savvy shopper. My sister is relentless about wanting me to use coupons and other discounts or purchasing based on price point. But the truth is, if it tastes good or is required for a recipe, I buy it. However, these days it's almost a necessity to be a little more frugal. One thing I have been paying closer attention to is how much cheaper dried beans are from canned ones. Sure, I still keep the canned beans on hand, but they're not my first choice anymore.

Since my dollar-to-dollar sense is not my strong suit, I won't go into the actual price comparison. What makes sense to me is that it takes three 15.5 ounce cans to equal one bag of dried beans. The canned beans have already been soaked and cooked, which means they've swelled two to three sizes bigger than their dry counterpart. Add in the water and other liquids needed to preserve the beans and there are going to be even less beans filling up the can.

The even bigger bonus for me, is that I don't always want to use the entire can of beans when I'm cooking for just me and my preschooler. DH works nights & DS is often out with friends or away for entire weekends, so when reducing recipes, I can easily stretch one bag of beans out to equal about 6 cans.

The other confession I have to make, is that I'm lazy. I love to plan ahead and I don't mind prepping the day before, but there are busy days when I'll get home and need something quick. Not something that has to soak overnight.

No worries! Dried beans can be soaked at your convenience, cooked and then cooled to room temperature. Then refrigerate the beans for up to four days in a covered container. Use the amount you need in any recipe, just as you would canned beans!

Soaking dried beans for six to eight hours will allow some of the gas-producing carbohydrates to be released, which is best for all, but if you find you don't have that much time, you can still use dried beans by doing a one hour soak. To prepare beans by this method, use a medium saucepan and enough water to cover the beans. Bring to a boil and boil for one minute. Turn off the heat and allow the beans to soak for one hour. Drain and use as desired.

Now, what would a real food comparison be without looking at the nutritional differences?


Regardless of their store-bought form, all beans are rich in soluble fiber, which lowers the level of LDL cholesterol in the blood. Soluble fiber also slows down the absorption of carbohydrates, which decreases the spike in blood glucose levels. Beans are packed with protein, B vitamins and iron and are considered part of the Meat and Beans group, as well as part of the Vegetable group on the Food Pyramid. Vegetarians can fulfill their daily allowance by substituting the beans for meat, while meat-eaters can fulfill their daily allowance of vegetables by substituting beans.

Since canned or dried beans inherently contain the same good stuff, the only real difference is what's added to the canned beans.


The numbers aren't real dramatic, until you get down to the amount of sodium. From zero to 1174 mg of sodium!? Ouch. We all know salt tastes good, but unfortunately, it's not good for us. Salt is already in nearly every processed food we eat and we may not be able to avoid it completely, but we can choose to decrease the amount we take in. To reduce the amount of salt when using canned beans, instead of just draining, rinse them as well.

I don't think there will ever be a time when I don't have canned beans on hand, but just the same, there will never again be a time when I don't have dried beans either. I hope you give dried a chance, if not for the cost savings, or the satisfaction of making a whole recipe from scratch, then do it for your health.

My favorite Bean soup is my 13 Bean Crock Pot Soup posted on Food.com.

Saturday, December 11, 2010

Brining a Turkey


Photo courtesy of Feldstein Photography


Brine is essentially a salt water bath for meat. Turkey is the most common, but you can brine chicken, fresh ham or even shrimp. Brining makes changes in the cellular structure of the meat through the process of osmosis.
Osmosis, by definition is the act of a liquid, usually water that passes through a thin, semi-permeable membrane to equalize the solvent concentration on both sides of the membrane.

Meat contains a lot of water, but only a small amount of salt, so when the meat is submerged in salt water, the solvent concentration is out of balance. To balance it again, the water from the meat moves through the skin and out of the bird, while the salt and any flavors in the brine, will be pulled into the meat.
At first it seems as if we're going in the wrong direction, as we would have salty, dry meat, if cooked right now.
But, we'll give it some time and let the salt do its duty.

The salt, now in the meat, will begin to attach itself to the muscle proteins. The fibers begin to weaken, swell and separate enough to allow more water to be stored in them. So, osmosis happens again to balance out the new concentration and the water in the brine begins to refill the fibers.

When these chemical changes have been made, the meat will have absorbed approximately 10% more water and salt from its original weight.

The changes aren't instant; however, so brining must be done in advance of when you want to roast the meat.
I like to do the brine the day before and refrigerate the meat overnight.

Brined meat will cook faster than if it had been roasted without the brine. Make sure to use a meat thermometer and check the temperature at the earliest recommended cook time. But even if your bird does cook longer than needed, it will still taste moist and tender because of the broken down muscle fibers and the additional water they're holding onto. ;)

Coarse kosher salt is the preferred salt for brining, but table salt (iodine-free) or sea salt can be used. Or, try a combination of flavored sea salt and kosher salt!
Generally, 1 cup of kosher salt for every gallon (four quarts) of water is recommended. Apple or orange juice and flavored vinegars, such as apple cider vinegar or pineapple vinegar can be substituted for a portion of the water.

To balance the salty water, a sweetener should be a part of the brine. Use sugar, brown sugar, molasses, honey or even agave nectar.


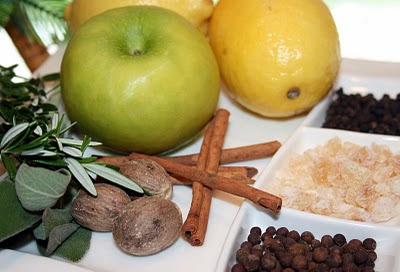
Seasonings, or aromatics, are used both in the brine and roasted inside the cavity of the bird. Since only the essence of the seasonings is small enough to pass through the skin and into the meat, your options are wide open. Whole spices and fresh herbs are excellent for brining. No additional salt is needed, but try things like fresh peppercorns, allspice berries, cloves, rosemary, sage, thyme, garlic or ginger. Apples and citrus fruits make great additions to the brine.

Because you'll be marinating a whole bird, you'll need something big enough to hold it. I've used a brining bag and a (very) clean cooler in the past, but it was really only a small investment, about $8, to purchase a 5 gallon bucket with a lid.

The process is pretty simple and I like the fact that it's done the day before. It takes a bit of stress off on the day of the holiday, when so many other things have to be prepped.

I like to buy a fresh, organic turkey, so I don't have to worry about thawing first, but frozen works just as well.
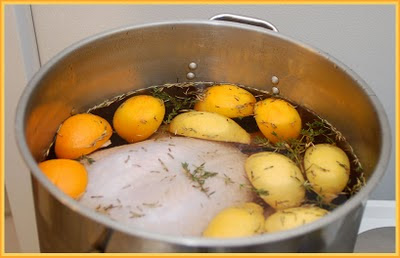
Prepare the brine and then chill it before adding to the bird. Clean out the bird, rinse well and then submerge in the brine with additional cold water. Refrigerating the whole mess can be tricky though. You want to keep the brining bird chilled at 40° F and finding room in the refrigerator for a 5 gallon bucket is no easy task. We have a fridge in the garage and we can take out the bottom shelf to make the bucket fit. But luckily for us, the weather around the holiday season is usually 30° or less, so we've also just put the bucket in the garage overnight.

When it's time to roast the bird, remove from the brine (discard brine) and rinse it really well, inside and out. Pat dry and place in roasting pan.

Now is the time to add the aromatics. The apples, citrus fruits and fresh herbs can be added to the cavity of the bird, then roast immediately. :)

My favorite method of roasting is the high-heat sear at 500° F in the beginning, to create a nice crust over the bird that will lock in the moisture. Then reduce the heat to 350° and continue roasting until the thermometer reaches 160°. Tent the bird with foil and allow it to rest for 15 minutes before carving.
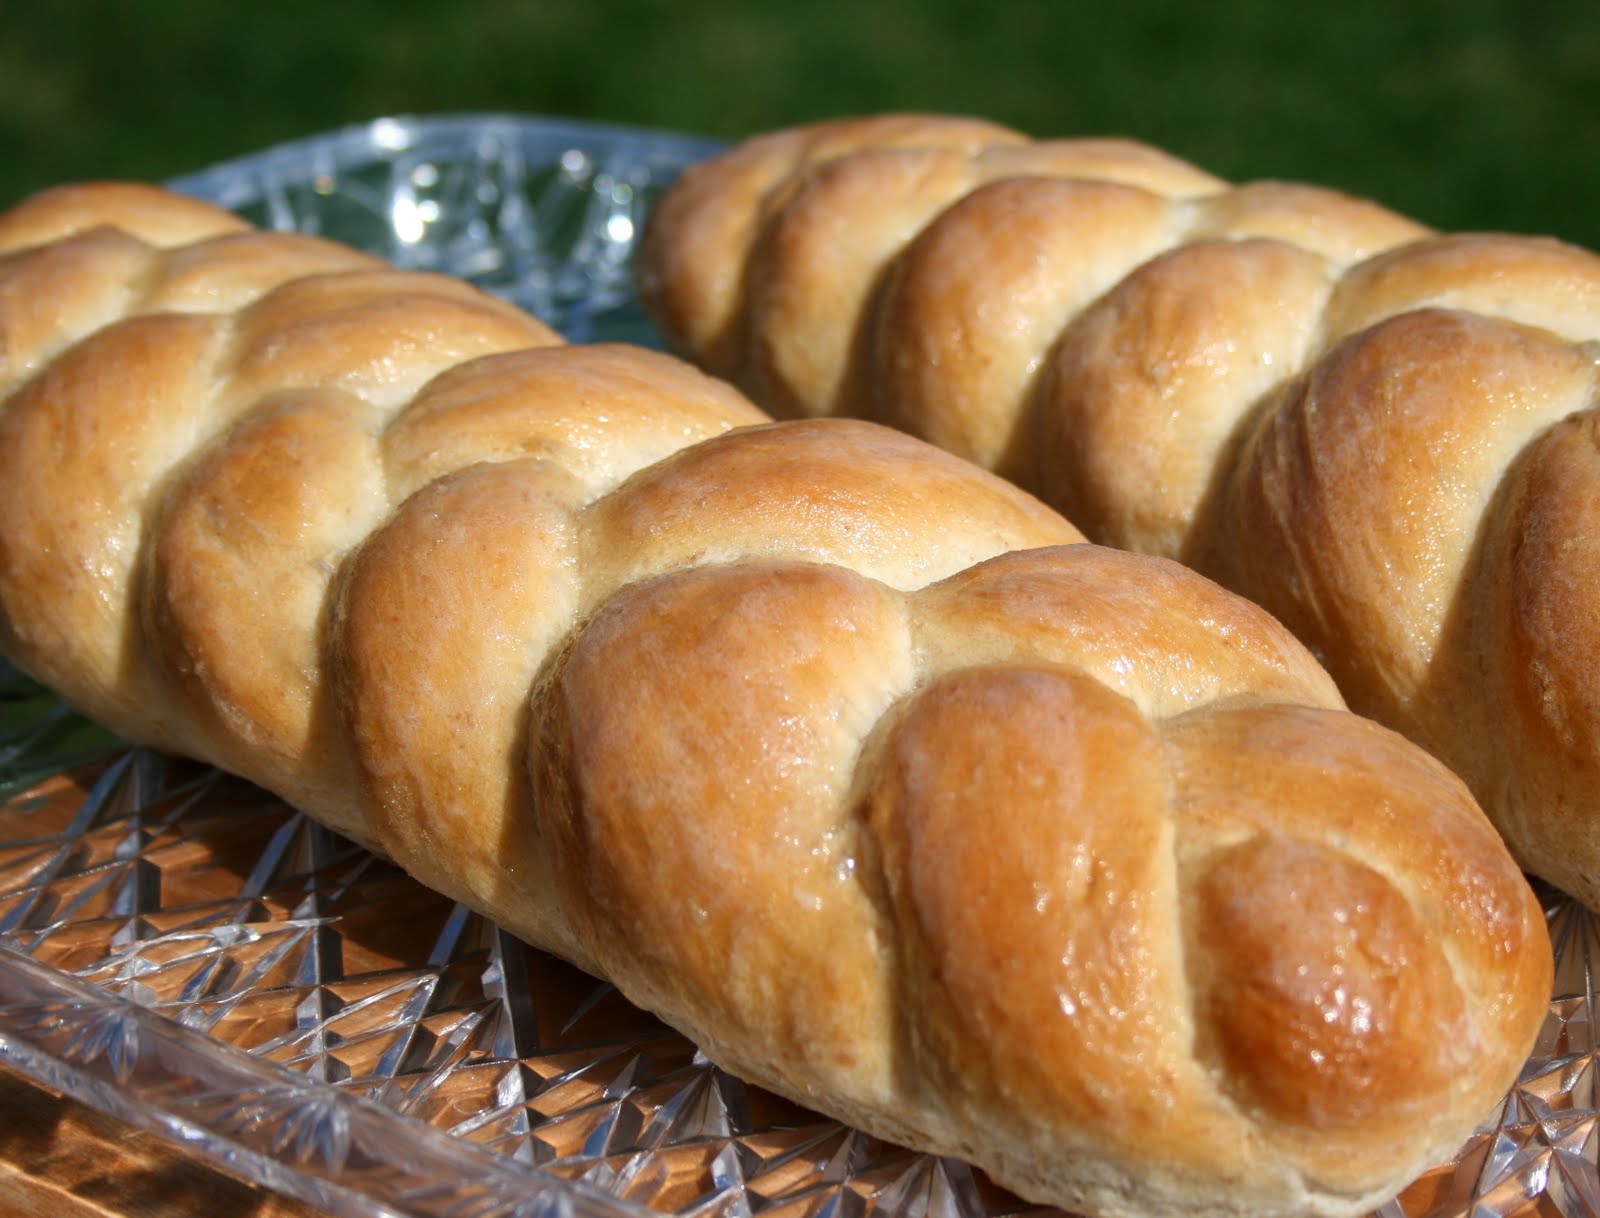

Photo courtesy of Feldstein Photography


Then get ready to enjoy the tastiest, juiciest turkey ever!
My favorite brining recipe, so far... is from Alton Brown's Good Eats show.

Alton Brown's Brined Turkey

1 (14-16 lb) whole turkey, frozen
For the Brine:
1 cup kosher salt
1/2 cup light brown sugar
1 gallon vegetable stock
1 tablespoon black peppercorns
1 1/2 teaspoons allspice berries
1 1/2 teaspoons chopped candied ginger
1 gallon water, heavily iced
For the Aromatics:
1 red apple, sliced
1/2 onions, sliced
1 cinnamon stick
1 cup water
4 sprigs rosemary
6 leaves sage
canola oil

2 to 3 days before roasting: Begin thawing the turkey in the refrigerator or in a cooler kept at 38 degrees F.
Combine the vegetable stock, salt, brown sugar, peppercorns, allspice berries, and candied ginger in a large stockpot over medium-high heat. Stir occasionally to dissolve solids and bring to a boil. Then remove the brine from the heat, cool to room temperature, and refrigerate. The night before you'd like to eat: Combine the brine, water and ice in the 5-gallon bucket. Place the thawed turkey (with innards removed) breast side down in brine. If necessary, weigh down the bird to ensure it is fully immersed, cover, and refrigerate or set in cool area for 8 to 16 hours, turning the bird once half way through brining. Preheat the oven to 500 degrees F. Remove the bird from brine and rinse inside and out with cold water. Discard the brine. Place the bird on rack of roasting pan and pat dry with paper towels. Combine the apple, onion, cinnamon stick, and 1 cup of water in a microwave safe dish and microwave on high for 5 minutes. Add steeped aromatics to the turkey's cavity along with the rosemary and sage. Tuck the wings underneath the bird and coat the skin liberally with canola oil. Roast the turkey on lowest level of the oven at 500 degrees F for 30 minutes. Insert a probe thermometer into thickest part of the breast and reduce the oven temperature to 350 degrees F. Set the thermometer alarm (if available) to 161 degrees F. A 14 to 16 pound bird should require a total of 2 to 2 1/2 hours of roasting. Let the turkey rest, loosely covered with foil or a large mixing bowl for 15 minutes before carving.

Wednesday, December 1, 2010

Good Gravy!


Making good gravy is a bit of a science experiment; although not a difficult one. But if there's a possibility of a shortcut to making something homemade, I'll try it! Some ideas turn out to be great and some turn out to be disasters. Even so, I say, "Take a risk!" But let me just save you the trouble of testing my gravy shortcut theory.
In my early cooking days, I always made gravy one way; by combining the flour and cold water in a lidded plastic container, used for shaking and pouring liquids. I deduced that if the water and flour mixture were to be hot before stirring into the pot, then the gravy would be on the table a whole lot quicker. Oh... how wrong I was!

I added the flour and water to my shaker container, and then put it in the microwave for about 30 seconds. I was very pleased with how nicely warmed the water was and what a genius idea this was going to turn out to be; and also wondering why no one had ever thought of it before? I popped the lid on the container and began to shake vigorously. That's when the lid exploded off like a rocket, rebounded off the ceiling and sprayed every corner of the kitchen and dining room area with white paste. We had popcorn ceilings in that old house, but after the gravy incident I started calling them papier mache ceilings.

I learned two important lessons that day. First, that something chemical happens to flour when it's mixed with a liquid and secondly, that the next time I wonder why no one has thought of my great idea, maybe I should re-think it myself.

I've made many more gravies since then; some perfect, some not, but I just consider it all practice. The formula is pretty basic, so I think it all comes down to technique when trying to make good gravy: Equal amounts of flour and fat, preferably meat drippings, and several minutes of constant whisking.

When I make something like a braised pot roast, I turn all the liquid into gravy. I combine about a 1/4 cup of flour and 1/4 cup cold water in a separate container, and then add in a touch of the hot cooking liquid to heat up the water. Then, while whisking the cooking liquid, I slowly pour the mixture into the pot. Cook and whisk over a medium heat until the cooking liquid thickens to my liking. This usually takes only a few minutes. When making turkey or chicken gravy to be served on the side, I make it from a small amount of the drippings, in a separate pan on the stove.

Practice is the key to good gravy, but until I get it right every time, I'm happy to note that a few lumps here and there seem to go fully unnoticed at my table of gravy goblins.


Basic Homemade Turkey Gravy

4 Tablespoons of the pan drippings (strained, if desired)
4 Tablespoons all-purpose flour
2 Cups liquid (water, broth or milk)

Heat the pan drippings in a saucepan over medium-low heat and then sprinkle the flour over the drippings. Cook and whisk this mixture until it's combined and the flour begins to cook. When the flour is cooked (about 1 minute), remove the pan from the heat and slowly pour the desired liquid into the pan, while whisking constantly. When the liquid is combined, return the pan to the heat and continue whisking until the gravy is your preferred consistency. If it's too thick, whisk in a little more liquid. If it's too thin, combine 1-2 Tablespoons flour with an equal amount of cold water. Add in a touch of the hot gravy, to bring the water up to temp, and whisk into the pan.

Yield: 2 cups

Wednesday, October 20, 2010

A is for Apple!


Caramel Apples
Posted to Food.com by B.B.Grimm


Although apples grow all year round, September through November is considered the apple season, and with over 7000 varieties, there is an apple for every taste and every purpose imaginable.  Apples can be used in everything from beverages and desserts to savory dishes.  John Chapman, better known as Johnny Appleseed, spent 49 years of his life growing apples over as much of the country as he could.  His goal was to teach everyone to grow apples so that no one would ever go hungry.  He walked his way through Ohio, Michigan, Indiana and Illinois planting apple trees, creating orchards, teaching folks to cook with apples and giving away seeds, so others could plant trees and share the seeds as well.  Best grown in temperate climates, Washington State now grows over 50% of the nation's apples.  Apples have many healthful properties; growing up we heard the saying, "An apple a day keeps the doctor away."  And as legend goes, Johnny Appleseed's first illness was the cause of his death at age 71!
This month we have been experimenting with apple recipes and we've made treats for kids and adults, beverages and delicious dinners, all featuring apples.  I'd like to share a few of our favorites with you today.

During the holidays we've always bought sparkling apple cider for the kids to enjoy and now we've been able to enjoy it homemade with a popular German recipe, posted on Food.com by a good friend of mine, NorthwestGal.  We've made this recipe with apple juice, fresh cider and even cranberry juice!  For our last football get together with our cousin, I made this Apple Pecan Torte.  It's very easy, despite the long list of ingredients and was a big hit with everyone.  And of course, it's not Halloween without a good caramel apple!  Enjoy!


Apple Ladybug Treats
Posted to Food.com by Sharon123


Apfelsaftschorle (Sparkling Apple Juice - Homemade)
posted by NorthwestGal

12 ounces frozen apple juice concentrate
36 ounces club soda (fill juice can 3 times)

Empty undiluted frozen apple juice into decorative pitcher or 2-quart serving carafe. Fill juice container with club soda (3 times) and pour into the pitcher; stir well.  Chill, and serve in fluted champagne glasses.

Apple Pecan Torte
My version, inspired by Apple Torte posted by dawnab


Crust:
8 ounces butter, softened
2/3 cups sugar
1/2 teaspoon vanilla
2 cups flour

Filling:
8 ounces cream cheese, softened
1/4 cup sugar
1 teaspoons vanilla
1 eggs

Topping:
2 apples, peeled, cored and sliced (I like Granny Smith)
1/2 teaspoon lemon juice
1/3 cup sugar
1 teaspoon cinnamon
1/8 teaspoon fresh grated nutmeg (or 1/4 teaspoon dried)
1/2 cup chopped pecans

Crust: cream butter and sugar, add vanilla and mix well.  Add the flour and blend until crumbly.  With flour-dusted fingers, press the mixture into the bottom and 3/4 up the sides of a 9- inch springform pan.
Filling: Beat cream cheese and sugar together and then add the vanilla.  Add the eggs and beat well  Pour over the crust.
Topping: Toss the apple slices with the lemon juice, sugar, cinnamon and nutmeg.  Arrange the coated apples on top of the cheese mixture.  Sprinkle the top with chopped pecans.  Bake at 350 for 45-60 minutes or until center is set and the crust is lightly browned.  Cool on wire rack for 1 hour, then refrigerate several hours or until serving time.

Dinnertime Superhero!


Photo by Lorilyn Tenney (*Tink)


Any recipe that I can use in more than one way gets VIP status in my house. Some days just get away from me. You know the ones. I may wake up early; even get a little work done before the rest of the alarm clocks in the house go off. Then my teenager ignores his alarm and doesn't get up for school until five minutes before the bus will be showing up... six blocks away. Instead of rushing to get ready though, he moseys in to me and asks if he can borrow the car. As I think about his request, I realize I have a doctor appointment, a package to Fed-Ex and a toddler to drop off at preschool, not to mention everything I need to do at home. I begin my denial with an apologetic, "Oh. Honey, I have to..." and that's when he disappears from the doorway, leaving me to wonder, "Just how do I expect to get it all done?"

Recipes like lasagna, quiche, hamburgers or meatballs are excellent for putting together, freezing and then baking when you need them. And now, my friends, you too can cover up the fact that you didn't even think about dinner until the rest of the family was on their way home! Because who's going to believe that at the last minute you had time to make homemade dinner rolls or hamburger buns? Well, I will. But that's just between us.

It all started on a beautiful spring day in May of 2009. I had ground beef thawed and ready to transform into mini-meatloaves. It's rare for my family to argue with me about what I'm making for dinner. And considering some of the strange recipes I ask them to try, when they do oppose my standby recipe choice, I tend to listen. So meatloaf was out and Bryan suggested grilling hamburgers instead. I told him to fire up the grill before I realized we had no buns. I quickly ran to the computer and found this Taste of Home recipe for 40 Minute Hamburger Buns, posted to Food.com by Marie. Dinner was on the table in less than an hour, with homemade burgers and buns! I've been using this recipe ever since, for burgers, sloppy Joes, soups, hot dogs and shredded pork or beef sandwiches.

Not that these buns need any help, but I recently found a recipe posted to Food.com by Brenda. It's one she created at home, out of her love for the King Arthur brand Everything Bread and Bagel Topping. I whipped up a batch of 40 Minute rolls, using this topping, to accompany dinner. My family thought I was a genius! They could be right, but I'm not one to brag. Living up to its name, this Everything Topping is great on everything from loaves of white or wheat bread to bagels and rolls. Even for the beginning baker or yeast-o-phobic, these recipes can turn you into a dinnertime superhero!

40 Minute Hamburger Buns
Recipe posted by Marie, Photo by Lorilyn Tenney (*Tink)


Everything Topping - Bagels, Rolls, Bread
Recipe by Brenda., Photo by Lorilyn Tenney (*Tink)

Sunday, October 3, 2010

Karen's Skillet Lasagna - A busy day life saver!


This is a milestone year for our family.  At the same time we are sharing Sophie's joy and excitement for preschool, we find ourselves struggling to get through Nick's senior year with our sanity intact.  I can multitask, sure, but the work involved in senior year is daunting.  Senior government projects and presentations, community service projects, photos, announcements and of course, the senior apparel.  Not only is it time consuming, but it's all adding up very quickly, and to be completely honest, I'm overwhelmed.  We've had four photo sessions.  One for each kid through the school and one for each through a portrait studio.  It might sound a bit overkill to have that many photos but I've lost some confidence in the photo studio that contracts with the schools. 
Nick's senior school pictures were taken when we went to the school for registration.  The students file into a classroom set up like a photo studio, while the parents wait outside.  I've obeyed this rule for the last 3 years, resisting the temptation to chase behind him, yelling out instructions on how to avoid a goofy smile.  But this year is his last, so I did just that.  I followed him in, telling him to smile, but not smile and at the last second I realize he's wearing a ridiculously oversize baseball cap, sideways.  "Get rid of that thing!" I shout. 
Last week the photos arrived and we all fell in love with his pose.  The best one yet (thanks to me), but there was just one little problem... the lighting.  He looked like he had two black eyes, in the hideously green stage of healing.  Add that to the green cast over his chin and around his mouth and he looked like the Incredible Hulk!  I couldn't send these photos out to his grandparents, unless maybe I had Nick autograph them all, "Lou Ferrigno" first.  The replacement package was just as bad as the first, so they were all returned and we had professional photos taken instead. 


With all this excitement, my fridge is bare.  I feel like I have no time and no energy to shop or cook.  If there was one thing I'd never want to admit, it's that I still like to eat the chili macaroni and lasagna flavors of Hamburger Helper once in a while.  They're convenient to have on hand and quick to make on busy nights.  But the preservatives and sodium content in the spice mixes have prompted me to find other alternatives.  One handy recipe we really enjoy  was created by an online friend, kzbhansen.   It's so easy and versatile that whenever I need a quick meal, I know I can whip this one up with whatever I have on hand.  I sometimes use green or red pepper in place of the mushrooms, broken lasagna noodles instead of the Mafalda (which I've never been able to find anyway), Mexican four-cheese blend instead of all cheddar and I always serve it with cottage cheese.  It tastes like lasagna without all the prep work.  If you miss the baked cheese layer, you can transfer the cooked meat and noodles to a casserole dish, sprinkle the cheese on top and then broil it for a few minutes, or until the cheese is melted and slightly browned. 

Karen's Skillet Lasagna


1 lb ground beef
1 medium onion, chopped
3 cups mafalda noodles (Mini Lasagna noodles)
1/2 teaspoon italian seasoning
1 garlic clove, minced
1 (4  ounce) can sliced mushrooms, sliced
1 (26  ounce) can pasta sauce
2 1/2 cups water
1 cup cheddar cheese, Shredded

Brown beef and onion in 4 quart Dutch oven over medium heat until no longer pink, drain.  Stir in remaining ingredients, except for the cheese.  Heat until boiling, stirring occasionally, then reduce heat and simmer uncovered 10-12 minutes or until pasta is tender.  Sprinkle with cheese and serve.  Serves 4-6

Monday, September 20, 2010

Braided Challah Bread


I love baking my own bread and I don't mind kneading it myself, but I usually just let the stand mixer do the heavy work. About 10 years ago I decided I needed to own an automatic bread machine.  You can't beat it if you only have five minutes to spare for prep work but want fresh bread a few hours later.  As it turned out though, I really missed the hands-on part of bread baking.  Eventually it took a backseat to my stand mixer and then was completely lost in the storage area of the garage that I like to think of as the Appliance Graveyard.  While I realize that anything in an area called a graveyard is probably due to be donated or thrown out, I can't seem to do that.  Just as soon as I donate it I'll want to use it.  I know this because once I donated my 20 year old ice cream maker, that had been in the Appliance Graveyard for 10, I found a new ice cream recipe I wanted to make that used a machine.  I'm still mourning the loss of my food dehydrator as well.
Last year my hoarding of the bread machine went from an annoying habit that my husband simply accepts in me to something possibly akin to opening King Tut's tomb, without the curse.  I found a bread recipe that used the bread machine to make the dough and then the shaping and final rising is done by hand.  I remembered that my model has a dough setting on it, but I'd never tried it.  We promptly began excavating for the bread machine. 


I made Bread Machine Honey Whole Wheat Challah bread, posted to Food.com by Rachel Leah D, that uses the machine to mix, knead and rise the dough, then I shape, rise and bake the loaves.  The resulting bread was tender, soft and had a hint of sweetness that compliments both a sweet or savory dish.  While I had intended to make the recipe as directed, I found there were some bumps in the road on the way to my success.  I only had 2 cups of whole wheat flour left, so I had to substitute with some white flour and I learned that my machine is not capable of holding the amount of dough this recipe made.  However, after an exhaustive online search I was able to locate a copy of my machine's long-lost manual and I now know that it makes one 2-pound loaf.

After adding all the ingredients to the machine I pushed the dough cycle button and let it go.  Just under two hours later, I happened to be in the kitchen, preparing my rolling mats for braiding the dough, when the machine showed that it had under 5 minutes left to go.  All of a sudden I heard a muted, yet still loud, "POP!".  Startled, I looked over at the bread machine and saw that the dough had expanded enough to unlatch and push up the lid on it's own! I had dough stuck to every inch of the interior, including the element below the bread container.  At this point I started to reconsider the curse aspect of unearthing my machine. 

The following recipe is my altered version because, as it turns out, we like it best with a combination of white and whole wheat flour and there were no braiding instructions in the original recipe.  I still use the bread machine but have also made the dough in my stand mixer.

Braided Challah Bread
1 1/2 cups warm water
1 egg
1 egg white
2 tablespoons olive oil
3 tablespoons honey
1 tablespoon sugar
2 cups cracked wheat flour
2 3/4 cups all-purpose flour
1/8 teaspoon salt
2 teaspoons active dry yeast (a 1/4 oz. packet)

For bread machine:
Add the first 8 ingredients to the bread machine in the order listed above.  Using a spatula, gently spread the flour out to cover all the liquid and then make a small well in the center.  Sprinkle the salt around the well and then add the yeast to the well.  Set the bread machine on the dough cycle and let it do it's magic. When the cycle is finished, remove the dough to a lightly floured surface.  Knead a bit of flour into the dough to make it workable, divided it into 3 equal pieces.  Divide the first piece into 3 equal pieces and roll them into 10-12 inch long ropes.  Gently squeeze the tops of each rope together and then braid them together.  Repeat with the other two pieces of dough to create three loaves.  Place the braided loaves on parchment lined (or greased) cookie sheets, cover them with a tea towel or foil and allow to rise for 30 minutes. Then bake the loaves at 325 F for 30-40 minutes.  Makes 3 large loaves.

Wednesday, September 8, 2010

Tomato, Bacon and Caramelized Onion Quiche


I've been trying out and creating several new quiche recipes over the last few months.   My main inspiration is a friend, and her three children, who were diagnosed with Celiac disease almost 2 years ago.  Anyone who has ever tried a low-carb diet will attest to the fact that cutting out breads and other baked goods is very difficult.  Celiac sufferers can't eat the wheat gluten, which is not only found in baked goods, but also items that do not contain flour.  Common kitchen ingredients, like ketchup, barbecue sauce, peanut butter, mayonnaise, salad dressings, syrup, taco seasoning, pasta sauce or wine can contain gluten.  But it's not just found in foods.  Hair products, cosmetics, sun-block, lotions and soaps can contain gluten as well.  After seeing the life changes my friend has had to make in order to keep her family healthy, and how costly it is to purchase gluten-free breads, cake and pancake mixes, it became my mission to develop gluten-free recipes that would satisfy their craving for baked goods, without sacrificing their health.

There are many gluten free products on the market and there are a couple major brands that produce gluten free baking mixes.  While I continue to play with rice flours and starches to produce breads and cakes that resemble those made with gluten, I am also trying out store-bought items that are gluten free.  Gluten free pie crust mixes are available, as well as pre-made, frozen pie crusts.  Another delicious option is to make a crust using crushed up gluten free cookies.  The recipe below is written with gluten free products in mind, but is just as easily made with your favorite brand or homemade recipe.

Tomato, Bacon and Caramelized Onion Quiche
1 frozen, gluten-free, 9-inch pie shell
2 Roma tomatoes, sliced thinly
5 slices gluten-free turkey bacon, chopped
1 medium red onion, sliced thin
3 eggs
1/2 cup milk
4 ounces Gruyere cheese, shredded (can substitute Parmesan, smoked Swiss or Cheddar)
1 Tablespoon fresh basil, chopped (can use dried)
1 Tablespoon fresh thyme leaves (can use dried)
1/8 teaspoon mustard powder
salt and pepper

Preheat oven to 375 degrees and bake uncovered pie crust for 10 minutes.  In large frying pan, cook the turkey bacon and red onion, over medium heat, until caramelized, about 10 minutes.  Remove from heat and set aside.  In a large mixing bowl, combine eggs, milk, cheese, herbs and seasonings.  Add the caramelized onion and bacon mixture; combine and pour all into the prebaked pie crust.  Arrange the sliced tomatoes on top.  Bake in a 375 degree oven for 45-60 minutes, or until knife inserted near the center comes out clean.  Serves 4

Wednesday, August 11, 2010

Oven-Baked Chicken Romano


As the name implies, Romano cheese has a starring role in this flavorful and healthier version of Chicken Romano.   Instead of being dredged in batter and fried or served with a fat-laden (although delicious) cream sauce, this oven-baked version offers plenty of flavor without the extra calories.

For over two thousand years, this hard, Italian cheese has been made in Rome, its namesake city, by a process known as rummaging the curd.  The curds of the cheese are drained well, then pierced before being salted and brined.  There are several types of Romano cheese, each made with a different milk and therefore producing slightly different flavors. 

The most authentic variety is Pecorino Romano and boasts a sharp, tangy and salty flavor.  To carry the title of Pecorino Romano, the cheese must be made under stringent Italian government guidelines.  To be precise, the cheese must be round, meet minimum weight requirements, be made from the milk of specific sheep, in a specific area of Italy and only manufactured between the months of October and July.  When Romano cheese is made from goat's milk it is called Caprino Romano and has a distinctly sharp flavor.  When it's made from cow's milk it has a milder flavor, which suits most American palates, and is called Vaccino Romano. 
All three varieties must be aged for a minimum of five months and are especially good for grating over dishes such as pasta, salads, breads and soups.
 
 Oven-Baked Chicken Romano


1/2 cup fine breadcrumbs
3 tablespoons grated Pecorino Romano cheese or 3 tablespoons parmesan cheese
2 sun-dried tomatoes, finely chopped (dry packed, or very well drained if packed in oil)
2 teaspoons dried parsley
1 Tablespoon chopped fresh basil or 1 teaspoon dried
1/4 teaspoon garlic powder
1/2 cup skim milk
8 chicken breast tenderloins or 4 boneless skinless chicken breasts
 
Preheat oven to 425.  In a shallow dish, or pie plate, combine bread crumbs, cheese, tomatoes, parsley, basil and garlic powder.  Pour milk into a second shallow dish.  Dip chicken pieces into milk, and then roll in the crumb mixture.  Place coated pieces in an ungreased 13 x 9 baking dish.  Bake in the 425 oven for about 15-20 min or until poultry is tender and no longer pink.  Serve with your favorite steamed vegetable or a small side of pasta.

Friday, August 6, 2010

Lemon-Filled Ginger Scones


I want to share a new scone technique that I recently tried.  Most scones I've made are dropped by spoonfuls into a small mound, like a biscuit, or they're patted into one (or two) large, semi-flat rounds that are then cut into triangles before baking.  The triangular scones were my preferred method until I tried these delicious Lemon-Filled Ginger Scones found in the Breast Wishes cookbook; the third in a series of cookbooks published to raise money for breast cancer patients.  While making about six different scone recipes in a matter of days, I realized that I'm partial to the scones made with buttermilk.

Contrary to what its name implies, there is no butter (or fat) in buttermilk.  It's ideal in baking because it acts very much like whole milk in pancakes, muffins and scones.  The flavor it lends to your baked goods is richer and it provides a softer, fuller-bodied texture.  I recently made homemade butter.  A crazy idea, I know, but it was too intriguing not to try it.  I've always envisioned old fashioned butter churns, which were as tall as a third grader, with a wearied farmer's wife methodically pushing the paddle around until the butter is made.  I gave absolutely no thought to what was IN the churn, however, until now.

I put one cup of fresh, heavy cream and about 1/4 teaspoon of sea salt into a sterilized pint size canning jar.  The rest is easy... or so I thought.  Simply cap off the jar and shake it until the cream turns to butter.  Shaking the liquid did start out easy but was killing me at about four minutes.  At that time it had magically thickened up to where I couldn't hear it moving in the jar anymore.  I peeked under the lid and literally saw whipped cream!  It was so thick now and my arms were really getting tired so I tried passing it off on my ultra-lazy teen, who was still in bed at half past noon.  But he claimed he was too tired to shake for even a minute.  So I continued shaking it myself and within just another 30 seconds it sounded like liquid again!  Sure I'd ruined it when I had stopped shaking to pass it off, I looked through the side of the jar and was shocked to see a big lump of fluffy butter just floating in buttermilk.  What an amazingly simple process!  I separated the buttermilk from the butter.  The butter was outstanding and it worked just like butter from the store.  It hardened in the fridge and softened when left out. 

I've often substituted a combination of milk and vinegar for buttermilk in a recipe, but now I'm thrilled to have an even more authentic substitution.  When I decided to make homemade butter it never occurred to me that the bonus would be fresh buttermilk.  But I wasted no time testing it out in my new favorite scone recipe!

Lemon-Filled Ginger Scones

2 cups flour
1/4 cup sugar
1 Tablespoon baking powder
1/3 cup butter
2/3 cup buttermilk
1 Tablespoon fresh ginger, grated
1/3 cup lemon curd
Sugar, to sprinkle before baking


Mix flour, sugar and baking powder.  Cut in butter with pastry blender or two butter knives, and then stir in the buttermilk and ginger.  Form into a ball and divide in two, so that one half is just slightly larger than the other.  Line a pie plate (or cookie sheet) with greased foil.  Place the larger half of the dough on foil and pat into an 8 inch circle.  Spread with lemon curd, and then pat out the other half of the dough into a 7 inch circle.  Lay it over the lemon curd and fold up the edges of the bottom dough, sealing the seam as best you can.  Sprinkle a bit of sugar (I like a lot) over the top.  Bake at 400 degrees for 20-25 minutes, cool slightly, cut into pizza slices and serve.  Serves 8

Monday, July 19, 2010

Gramma & Grampa Fjerstad's Lefse


One of the things I treasure most about family is the passing on of edible traditions.  When I was a teen my first husband's Norwegian grandparents taught me to make this thin, light potato pancake.  The recipe is delicious, of course, but the most wonderful thing about it was their tradition of making it together.  Just before Thanksgiving each year Carol and Bernie would make a huge batch of lefse.  Gramma would do the mashing, portioning and rolling, while Grampa's job was to do the cooking.  He would stand at the griddle with his lefse turner, a yardstick-like piece of wood, and happily flip each pancake over as it browned.  They would wrap and freeze half the pancakes for Christmas dinner and serve the remainder at the Thanksgiving meal.  Even though I learned to make it for the holidays, lefse is served all year round in place of a dinner roll or as a dessert.  I know many people like to eat lefse with cinnamon and sugar, lingonberry jam or even meat and cheese, but Grampa and Gramma taught me to simply spread it with butter and roll it up and that continues to be my preferred way of eating it.  The one tip Gramma stressed the most was to make sure your potatoes are refrigerator cold before adding the flour.  If they're warm when the flour is added the mixture turns to paste and will be impossible to roll out properly.  I'm still using Gramma's handwritten recipe, but I've been meaning to post it for a long time now, to make sure I don't lose it.
Traditional lefse making in Scandinavian countries was a practical way to use up an abundance of potatoes.  Now, for me, it's a way to share a taste of the heritage and the love I received from my son's great-grandparents.  And while I don't expect my young, rebel of a teenager to pick up a lefse stick anytime soon, I do hope that recipes like this will live on in his heart as a loving memory of his family.  Who knows?  One day I may be lucky enough to share this skill and my tools with his wife or his children.
The lefse rolling pin, with it's deep, checkerboard grooves and the yardstick-length lefse turner are traditional items used to make the pancakes, but both can easily be substituted with a smooth rolling pin and a spatula.  I'll often make the mashed potatoes the night before, so they can refrigerate and cool completely, and then the next day I add the flour, roll out the pancakes and put them on the dry griddle.  I've kept a round-shaped, Daisy brand griddle, for almost 20 years, just for making lefse.  But again, it can be done on a rectangular griddle or even in a fry pan on the stove.  If you make or enjoy lefse yourself, I hope this has brought back pleasant memories for you.  If you don't, I hope it inspires you to explore this Scandinavian tradition.

Gramma and Grampa Fjerstad's Lefse
5 lbs potatoes (8 cups mashed)
1/2 cup heavy cream (not whipped)
3/4 cup butter
1 tablespoon salt
4 cups flour (scant)

Peel the potatoes, cut into quarters (or smaller) and boil until tender.  You should be able to pierce the potato easily with a fork, but feel a slight resistance in the center.  Don't over-boil them.
Drain the cooked potatoes and then return them to the hot pot, but do not place back on the hot burner.  Let sit for about 5 minutes to steam out any additional moisture.
Mash the potatoes with the cream, butter and salt.  (Do this by hand, not an electric mixer.)
Place the potatoes in the refrigerator to cool completely.  (I like to stir them periodically until they're cold in the center.).
Begin stirring in the flour, a cup or so at a time.
Divide dough into 1-2 inch sized balls and roll each out into paper thin rounds on a floured board.
Bake on a hot, dry griddle. 
Lightly brown one side and then carefully flip the pancake to brown the other side.
Remove to a towel-lined plate (cloth or paper) and continue to stack the pancakes with paper towels between each one and a cloth towel to cover all.
To store, layer each cooled pancake between waxed paper and wrap in plastic wrap.  Store in the refrigerator until mealtime or wrap all in a Ziploc baggie and freeze for up to 6 months.

Thursday, June 10, 2010

Capers


Capers are the unopened flower of a perennial Mediterranean shrub called the Capparis Spinosa. The caper bush or caper berry grows wild all over the Mediterranean on stony ground and can even be found growing from cracks in stone walls.

Although the caper is thought of as a gourmet ingredient, used in gourmet dishes, it's actually a weed. Many times it's pulled out as a weed because of its ability to grow wildly without human intervention. The caper buds are harvested between May and August and are best picked in the early morning before the bud has had time to open into a flower.

Fresh Capers, before pickling:

The caper is closely related to the cabbage family and resembles several spices, like cress, black and white mustard, wasabi and horseradish. Although the caper is chemically related to these spices, without treatment the caper directly from the bush is quite bland. To develop the peppery mustard flavor desirable in many dishes, from pasta and pizza to fish and salads, the capers must be preserved in either vinegar or salt. The isothiocyanates, a phytochemical occurring naturally in cruciferous vegetables, contained in capers will react to the salt or vinegar to bring out the intense flavor of the caper. The pickling brings out the spicy and slightly sour flavor of the caper and although similar in flavor intensity to the olive, they aren't eaten straight from the jar. They are best used to compliment a dish by adding saltiness toward or at the end of cooking. Because the pickled capers are salty, very little extra salt, if any, is needed in the dish. Small capers are called nonpareils and are considered to be more valuable. The larger capers are sometimes called a salad caper and have a milder taste than their smaller counterparts.

Capers have been around for thousands of years, mentioned in the story of Gilgamesh found on ancient Sumerian clay tablets dating back to 2700 B.C., as well as by the Roman, Apicus, who is believed to have written the very first cookbook in the 1st century. Caper bushes were used by the ancient Greeks not only for cooking, but also for medicinal purposes. The capers were an ingredient in their food while the leaves and roots were used to heal one's ailments.
Capers are high in anti-oxidants and assist with healthy liver function. Recent studies show that isothiocyanates neutralize carcinogens in the body and therefore are effective in lowering the risk of several types of cancers.

A few of the recipes we've enjoyed featuring capers can be found on Recipezaar.com:
Chickpea Salad with Cumin Vinaigrette by Kumquat the Cat's friend:


Simple Marinade and Rub for Fish by LifeIsGood


and
Pasta Puttanesca (the Madame's Pasta) by Pot Scrubber

Thursday, June 3, 2010

Tarragon and Thyme Quiche


Tarragon, known as the King of Herbs in France, is an herb used mostly in classic French cuisine for vinegar, salad dressings, Béarnaise sauce, and homemade mustard. When paired with parsley, chives and chervil, it becomes the seasoning blend known as fines herbes. The name originates from the Latin word dracunculus, meaning little dragon. After being translated in Arabic to tarkhum and in French to esdragon the herb’s name evolved into a combination of both words to form tarragon.

Tarragon is part of a family of herbs known as the Dragon Herbs, due to their snake-like root system, and because of their serpentine roots, the Dragon herbs were used as medicine in medieval times to cure stings, snake bites and the injuries sustained from rabid animals. French Tarragon possesses an essential volatile oil, chemically identical with that of Anise, and when used fresh, with a light hand, adds a sweet licorice essence to the dish. It compliments most vegetables, fish, poultry, soups, egg dishes, herbed butter or mayonnaise, and makes plain white vinegar dazzle for use in sauces and mustards. However, the anise-like oils are lost when the herb is dried and if the herb is cooked too long it becomes bitter.

Sometimes I try a recipe with a strange ingredient combination out of curiosity and sometimes it’s simply because everyone else is afraid to try it. (Remind me some time to tell you about Pineapple-Garlic Upside Down Cake!) When I stumbled onto the recipe for Tarragon-Thyme Quiche, posted to Food.com by Starman, I thought there must be a typo in the ingredients. I couldn’t imagine a savory pie filling inside a cookie crust, but the recipe had not yet been reviewed by another chef, so I knew I had to try it.

I admit I had my doubts right up until I was serving it, so even though my family is game to try anything once, I didn't tell them about the ingredients until I heard a lot of, "Mmmmm!" going on around the table. The dish strikes a balance between sweet and savory that is very satisfying, and with many ingredient variations available, this recipe is an excellent way to clean out the fridge at the end of the week. I used all fresh herbs, smoked Swiss cheese, turkey-bacon, white onion, green bell pepper, 2% milk and the graham cracker crust option. Every ingredient came together, melding into one beautiful harmony. So, get in touch with your adventurous side and give this quiche a try!

Tarragon and Thyme Quiche

Tuesday, May 18, 2010

There's always room to grow!


[b]"Enjoy every sandwich."
~Warren Zevon[/b]

It's true that one's taste can change over time. Even when we're absolutely sure it won't. For example, when I met my husband he ate take out pizza, pancakes or a bland, meat-like substance from the freezer aisle called, Steak-Ums. I had to revise my way of cooking for a good while, as he couldn't eat anything remotely spiced. However, just the other day we were scarfing down a scrumptious appetizer of bacon wrapped chicken, rolled in brown sugar and cayenne. They were hot, but oh so good! As he popped another one in his mouth he laughed and said, "13 years ago I wouldn't have been able to eat this!"
Yep, you've come a long way, Baby!

On the flip side, I've refused to eat mushrooms for as long as I can remember. My parents used to tell me that as a tot I would cry over and over, "More rooms! More rooms!" at the dinner table. No doubt they were mistaking my plans for the Barbie Townhouse with wanting another squishy glob on my fork. But my mushroom haunting doesn't stop there. Just before Christmas my toddler daughter found an old video game we bought before she was born, called Luigi's Mansion. She then began renaming her older brother, dad and me with character names in the game. She's Luigi, daddy is Mario, big brother is Bowser and mom is..... Mushroom Dude. What?! Why can't I be Princess Peach?!  Luckily, as we are now heading deep into her Scooby Doo phase, she's renamed us all again.  Daddy is Shaggy, she's Freddy, my mom is Velma and I get to be Daphne.

The most recent round of Pick A Chef, on Recipezaar.com in the Contest and Events Forum, has been especially interesting due to my self-imposed Green Eggs and Ham Rule. Each round I challenge myself to try a new ingredient or a new technique. This round I seemed to be drawn to mushroom recipes. One in particular, posted to the site by Two Socks had to be tried, simply because of the name, Werewolves of Lundon. And now just like the 70's hit song by Warren Zevon, I can't get this dish out of my head! The mushrooms aren't over cooked and mushy, just a wildly flavorful glaze that presents a jazzy burst of flavor in every bite. I'm still in disbelief, but I think I may actually like mushrooms! I'd like to go so far as to say that I've widened my horizons just a little bit.

How have your tastes changed? Are there foods you thought you'd never eat that you tried again and found you liked or even loved?  I'd like to share these mushrooms in disguise with you.  They have great savory flavor with just the right amount of kick from the cayenne and hot sauce.  The whole family loved  them and I've now made them for an omelet filler as well as a simple side dish at dinner.  Below is my slightly altered version of the posted recipe.  I hope you enjoy it as much as we did!

Werewolves of Lundon

20 ounces fresh mushrooms, rinsed (I used half white and half baby bellos)
3/4 cup butter
2 garlic cloves, minced
3/4 cup Worcestershire sauce
1/2 teaspoon cayenne pepper
1 tablespoon Texas Pete hot sauce (or your favorite brand)
1/4 teaspoon sweet paprika
salt, to taste
Cut the mushrooms in half and set aside.  Combine the Worcestershire, cayenne, hot sauce, paprika, and salt in a small bowl.  Mix well and set aside.  Melt the butter in a large nonstick skillet over medium heat.  Add the mushrooms and gently toss to coat with butter.  Add the garlic and sauté mushrooms and garlic for 1 minute.  Add the Worcestershire mixture and gently stir to coat mushrooms.  Raise heat to medium-high, cover, and stir every few minutes until the butter separates from the sauce and the mushrooms are coated with a heavy caramel-like glaze.  Using a slotted spoon, remove mushrooms to a serving dish.  Discard remaining sauce and serve immediately.
Serves 4

Saturday, April 24, 2010

The best joke I never got...


I'm so happy to see a few warm and sunny days! Summer doesn't officially start until June 21st but I'm already planning our first backyard barbecue. There will be the standards, of course; potato salad, macaroni salad, chocolate cheese ball and some refreshing beverages. But instead of burgers and hot dogs this time, I'd like to start the summer off with a fun and delicious main course that brings back memories of my childhood.


During all my grade and middle school years we would spend holiday weekends camping up at a family friend's cabin on Lake Bosworth. I always loved the relaxed, potluck atmosphere and one of the highlights was a recipe that our Filipino friend would make. The three dads would stand around the barbecue, tending the skewered meat, while we kids anxiously awaited its readiness to eat. The smell of the marinade caramelizing, and infusing the meat with its amazing flavor, made us drool like a pack of wild dogs. When the meat was ready, the dads would holler out, "Who wants monkey meat!"

Sure, the first time I probably scrunched up my face and refused to try it. But dad, with his mission to widen the culinary horizons of his children, would never give up. I honestly don't remember a time when I didn't eat the monkey meat. However, I remember asking every time we ate it, "What kind of meat is it really?" There were lots of giggles from us kids, lots of inside joke chuckles from the dads and lots of requests for more monkey meat.

I almost hate to admit that this may be the only joke I never really got until 30 years later. In July of 2008 I was looking for something new to do with pork tenderloin when I stumbled on a recipe called, Monkey Meat, posted on Recipezaar by Judy81350.

Imagine my surprise when I realized that not only had the dads kept the secret all those years, but that it was in fact a real recipe! I had to try it; I had to share a little bit of my childhood with my family. It's amazingly simple and so delicious. The following recipe is my version of the original, as I prefer to use the tenderloin instead of the roast, low sodium soy sauce in the marinade and adding vegetables to the skewers. Feel free to change up the veggies; maybe use mushrooms or some pineapple even!


Monkey Meat

3 lbs boneless pork tenderloin cut in long 1/2 inch thick strips
12 ounces carbonated lemon-lime beverage, like 7 UP (just don't use a diet soda)
12 ounces reduced sodium soy sauce
15 garlic cloves, sliced
1 large onion, cut into 1-1/2 inch chunks
1 large red bell pepper, cut into 1-1/2 inch chunks
1 large green bell pepper, cut into 1-1/2 inch chunks
20-25 wooden skewers soaked in cold water for 30 minutes or more.

Mix 7UP, soy sauce and garlic in large bowl.
Place pork loin strips in bowl. Cover and let sit in fridge overnight.
Weave meat and veggies onto skewers.
Grill over medium coals until done, 10-15 minutes.

Serves 10
Prep time: 20 minutes plus overnight marinating
Cook time: 15 minutes

Tuesday, March 30, 2010

I'm doing Kart Wheels!


I just have to share these cookies! I made them yesterday for a RecipeZaar event called Pick A Chef. Definitely a keeper! They're just so cute!

The recipe makes 6 large cookies or you can cut each dough portion in half & make smaller cookies, but I loved how quick & easy these were & we don't have a lot of extra cookies sitting around that we HAVE to eat. ;)
As it was, Bryan & I had to stop ourselves from eating them all before we told the kids about them! We saved one for each of them for after Sophie's nap.
I love how big & special these look, so in the future I'll double or even triple the recipe and still make the large cookies. The dough is super easy to make and handle. I started out making the impressions with a metal heart shaped measuring spoon (a beloved gift from my sis!) so the cookies would be round with a jelly heart in the center, but the impressions just weren't big enough that way and I had to make them bigger with my thumbs. I think next time I could make double the cookies (not the recipe) & make a Tablespoon heart impression in each smaller cookie, using less jam.
Today I used raspberry pie filling (a can I've been hanging onto for a VERY long time, but can't remember what I bought it for) and the 6 large cookies barely held one Tablespoon of that (I have plenty leftover to make more cookies! ).

From the A-Z Kids Cookbook (which I think I actually own...) but posted on RZ by JDame: Kart Wheels

Wednesday, March 17, 2010

It's Made in America!


As parents, we do our best to stay vigilant when it comes to the toys our children play with. It's no surprise that recent news stories about toy manufacturing done in foreign countries, using toxic materials, has cast an ugly shadow over the entire toy industry. What was a surprise to me however, was reading an article with good news about a toy. As it turns out, one of my daughter's favorite toys can proudly wear the label, Made in America. The highly recognizable Little Tikes Cozy Coupe toddler car is made in Hudson, Ohio and when I stumbled on this article at MSNBC, Made in U.S.A. makes Cozy Coupe a Rarity, by Allison Linn, I felt proud to have been a loyal Little Tikes customer for the last 17 years. But what really made me feel good was when I saw the link asking for readers to submit photos of their loved ones and their Cozy Coupes. Every parent loves to show off photos of our kids and here was a chance to not only show off Sophie, but to show my support for a company whose ultimate goal continues to be one of building durable and safe toys for our children.
The submitted photos were posted this morning and I so enjoyed looking at every single one of them (the Cozy Coupe Drive-In being a favorite). I'm also proud that my little tot, cruisin' in her Cozy Coupe, made the cut. You can see all of these little sweeties and submit your own photos at Cozy Coupes - Made in America.

Thursday, March 11, 2010

The Mirro Cookie-Pastry Press


I borrowed my mom's Mirro brand Cookie-Pastry Press to make some spritz cookies; about 15 years ago. Periodically I wonder if she ever gets a craving and then curses me for never having returned her press. For the record, I'm usually really good about returning everything I borrow. Well, except for that hot air popcorn popper she loaned me...

Generally I tend to gravitate toward the new & improved things, but lately it seems that with kitchen gadgets I'm hanging on tighter than ever to some of the old ones. The faded brown and orange box of the cookie press has fascinated me for years. I love the 70's writing style on the box and the fact that the booklet of recipes and instructions spell the word cookie with a y instead of an ie. The Aluminum Goods Manufacturing Company was the result of a merger between two competing Wisconsin aluminum companies in 1893. They began producing kitchen equipment in 1917 when they launched their flagship line of products, the Mirro Aluminum brand, and quickly became one of the largest producers of aluminum products in the United States. During WWII they retooled their factories to make aluminum products for the military and when the war ended in 1954, the company looked for a new market and branched out into aluminum toys as well. By the 1960's the Mirro brand of cookware was flourishing and the company was renamed to the Mirro Aluminum Company.

I'm guessing that mom purchased this press sometime in the early 70's; based on the box design and the fact that she was an active Room Mother during my early school years. I carried on that tradition with my son during his early years and will again with my daughter when she starts school. When all is said and done, this humble gadget will have created hundreds of smiles.

Using a cookie press is a rather simple procedure of filling the tube of the press with cookie dough and turning a knob on top of the tube, or pulling a trigger, to extrude the dough through the decorative plates at the other end. However, there are a few tricks to ensure the proper dough consistency. Start with refrigerator temperature butter. Then gradually cream in the sugar until the mixture is light and fluffy but avoid over-creaming, as it will cause the mixture to increase in volume and become too soft to work with. If your dough becomes too soft while mixing, you can add a couple tablespoons of flour or refrigerate your empty press before filling it with the room temperature dough. Always form your spritz cookies directly onto a cool, ungreased cookie sheet and bake until they are just set or slightly brown. Not over-baking will produce cookies that are melt-in-your-mouth tender. While butter is traditionally used to make butter cookies, margarine or shortening can be substituted. Neither will provide the same butter flavor, but cookies made with shortening will hold their shape better in the oven. After baking, remove the cookies immediately and transfer to cooling racks. Spritz cookies are versatile, in that they can be sprinkled, iced, decorated with candies, dipped in chocolate or made with tinted dough to match any occasion.

While these tender, pressed cookies require extra care when storing, they freeze very well when stacked between layers of waxed paper. This makes them top considerations for holiday baking, school bake sales or church functions because they can be made ahead and frozen until the day you need them. As the name implies, the Mirro Cookie-Pastry Press isn't just for cookies. It also makes canapes, appetizers, cheese straws, crackers, meringue shells, cream puffs, eclairs and ladyfingers. If you have one of these overlooked kitchen gadgets sitting around, go ahead and pull it out; see how many smiles you can create!

Sour Cream Spritz Cookies


Creative Commons License
TinksTreats by Lorilyn Tenney is licensed under a Creative Commons Attribution-NonCommercial-NoDerivs 3.0 Unported License